The e-mail accounts of employees (not of students) on the university's Exchange mailsystems regularly achive e-mails, which are older than three years, in the background and store them in a separate archive account. For more information, please visit Mailbox Archive.
If you want to archive your emails locally on your computer, you can use the following instructions:
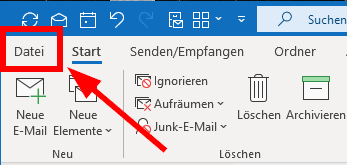
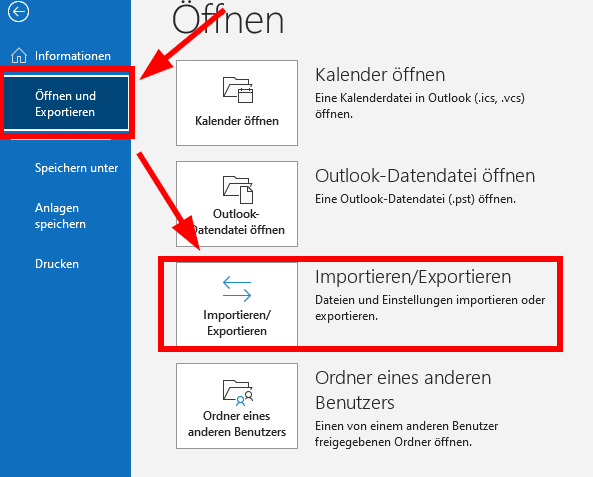
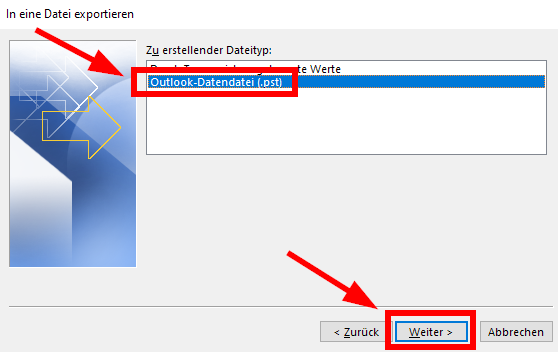
In these instructions, we will show you how you can export your emails in Outlook to a file and archive them for future access.
Tip: To find emails that you want to move to specific folders for archiving or deleting, you have two options:
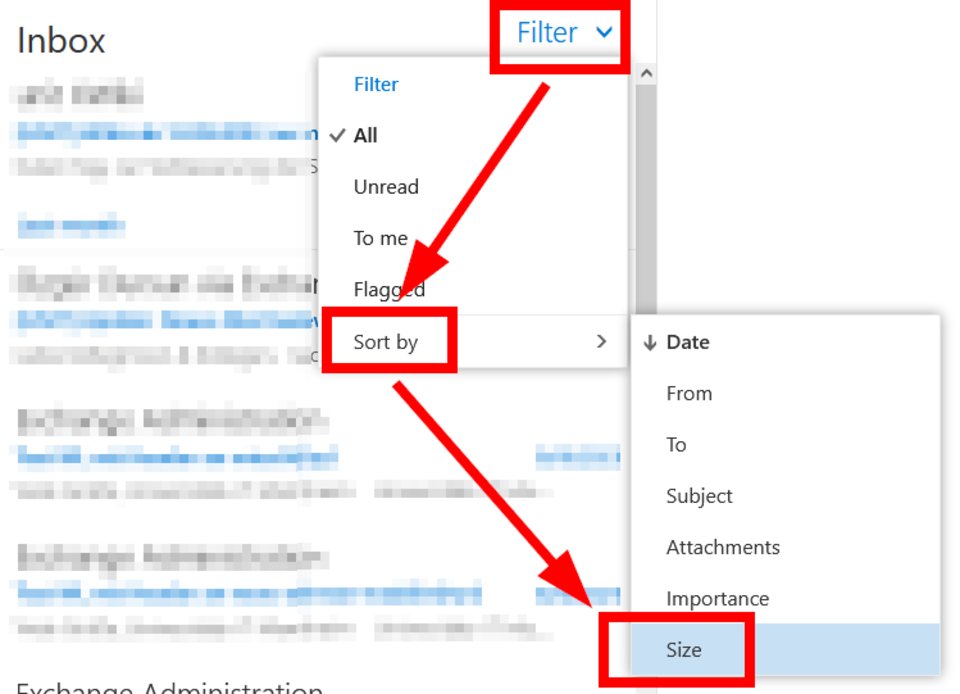
- In Outlook Webmailer, filter the emails by size by clicking on “Filter”, then “sort by” an “size”:
- or you can use search folders in the Oulook App on your computer. A tutorial for that can be found at the official Microsoft Support.
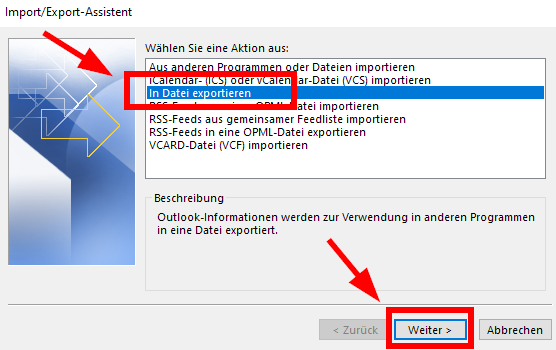
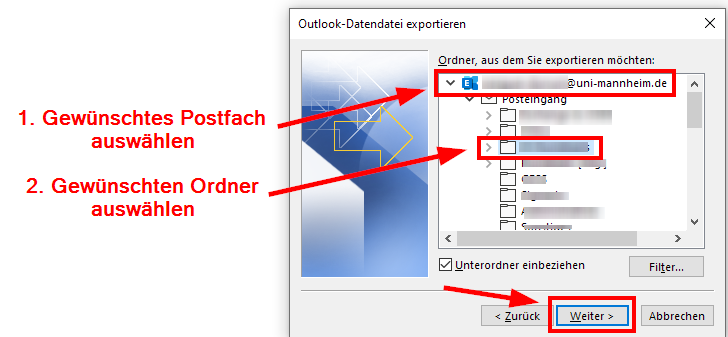
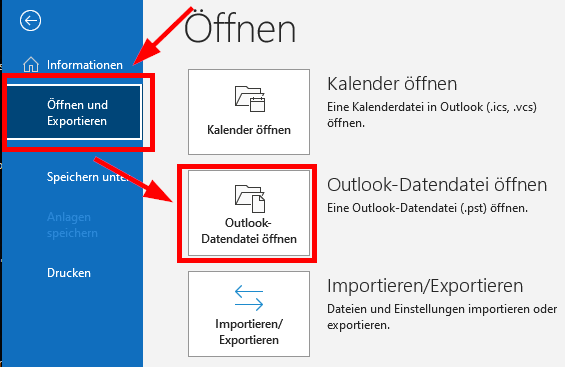
5. Navigate to the relevant mailbox and select the relevant folder by clicking on it. (The subfolders including their contents are automatically included):
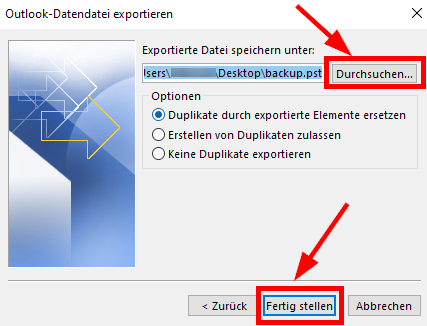
6. In the next window, click “Search” and select a storage location for the new archive file. Then click “Next”:
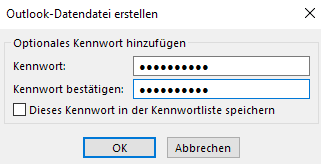
7. You can also select a password that is required to open the file. If you do not want to select a password, you can leave the field empty and continue by clicking “OK”.
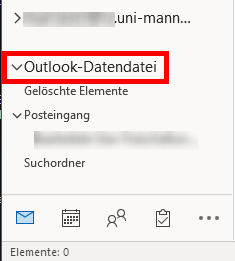
8. If required, you can now open this file with Outlook.
The file is permanently open in Outlook like an archive mailbox. You do not need to re-open it every time. (However, you can close the file if you want to):
9. After you have stored this file *, you can delete the relevant folder in Outlook to have more storage capacities.
Please make sure to store the archive file not only locally on your computer/