Securely Erasing Hard Drives and SSDs
To remove data from unused hard drives, it is important to securely erase them so that they are not recoverable. Simply erasing them or re-formatting them is not sufficient. On this website, you can learn how to securely erasing traditional hard drives (HDDs) as well as SSDs.
HDDs: Multiple overwriting of the stored data with random data securely erases the previous data.
SDDS: Using the ATA Secure Erase command securely erases the data.
Securely erasing HDDs (“traditional” hard drives)
Requirements:
- The hard drive to be deleted is still part of the PC.
- Alternatively: The hard disk to be deleted is removed and you have the option of connecting it to the PC, e.g. via a USB adapter.
- An empty USB stick.
- A PC with Internet connection and access to an administrator account.
In the example below, we use the free software ShredOS for secure data deletion.
To create a ShredOS boot stick, you need a PC with an Internet connection and a USB stick. Please note: By creating the bootstick, all data on the USB stick will be irretrievably deleted.
- Connect the USB stick to the PC.
- Download the latest version of ShredOS.
- Scroll down until you get to the download of the “Latest Release Version”. Select the file “... For USB Vanilla DRM”.
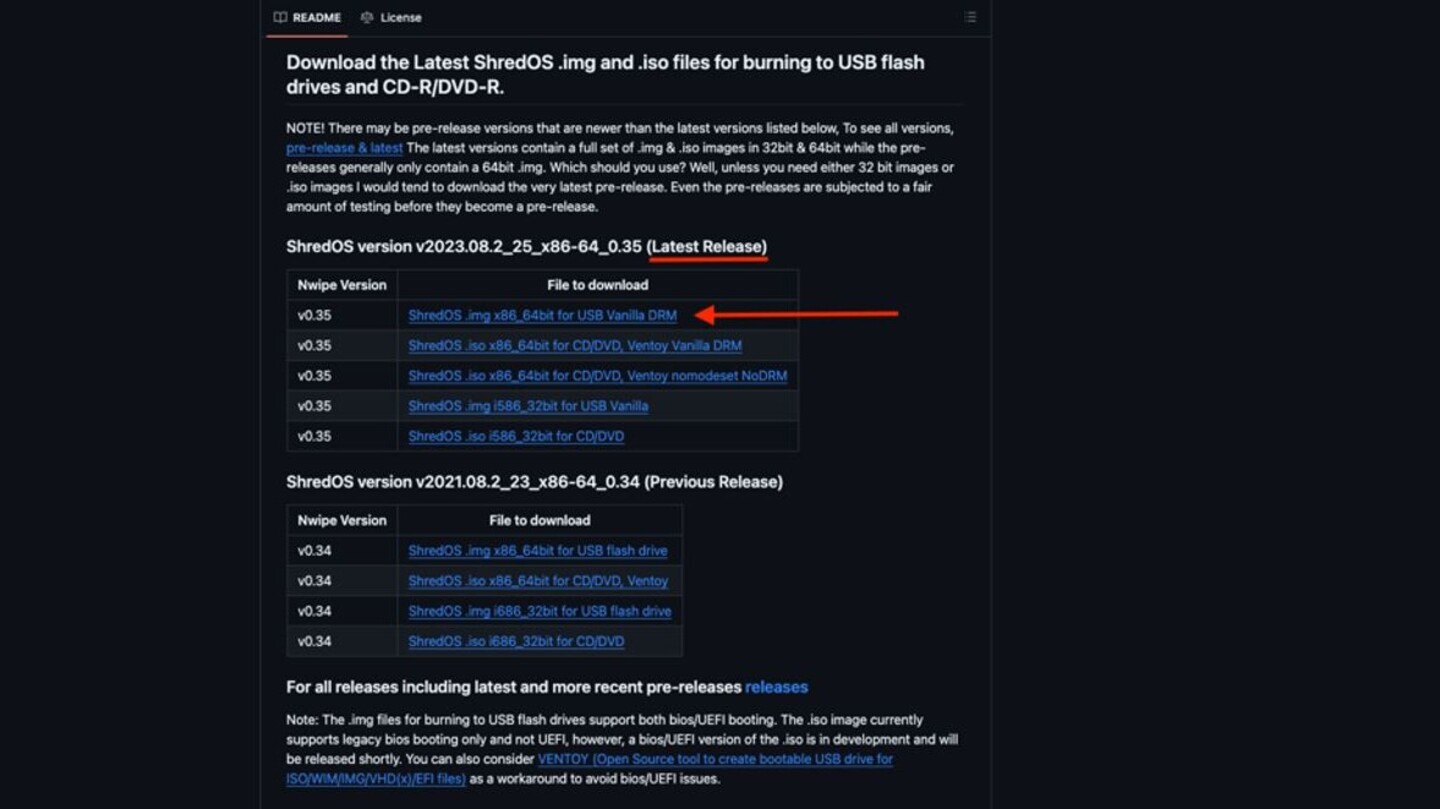
In the screenshot above, the file is called “ShredOS .img x86_64bit for USB Vanilla DRM”.
You need a special program to create a USB boot stick with the downloaded file. The following are examples of Windows, macOS, and Linux:
- Windows – For further information, see below
- Windows, macOS, and Linux – For further information, see below
Regarding number 1: Creating a USB boot stick on Windows (with Rufus)
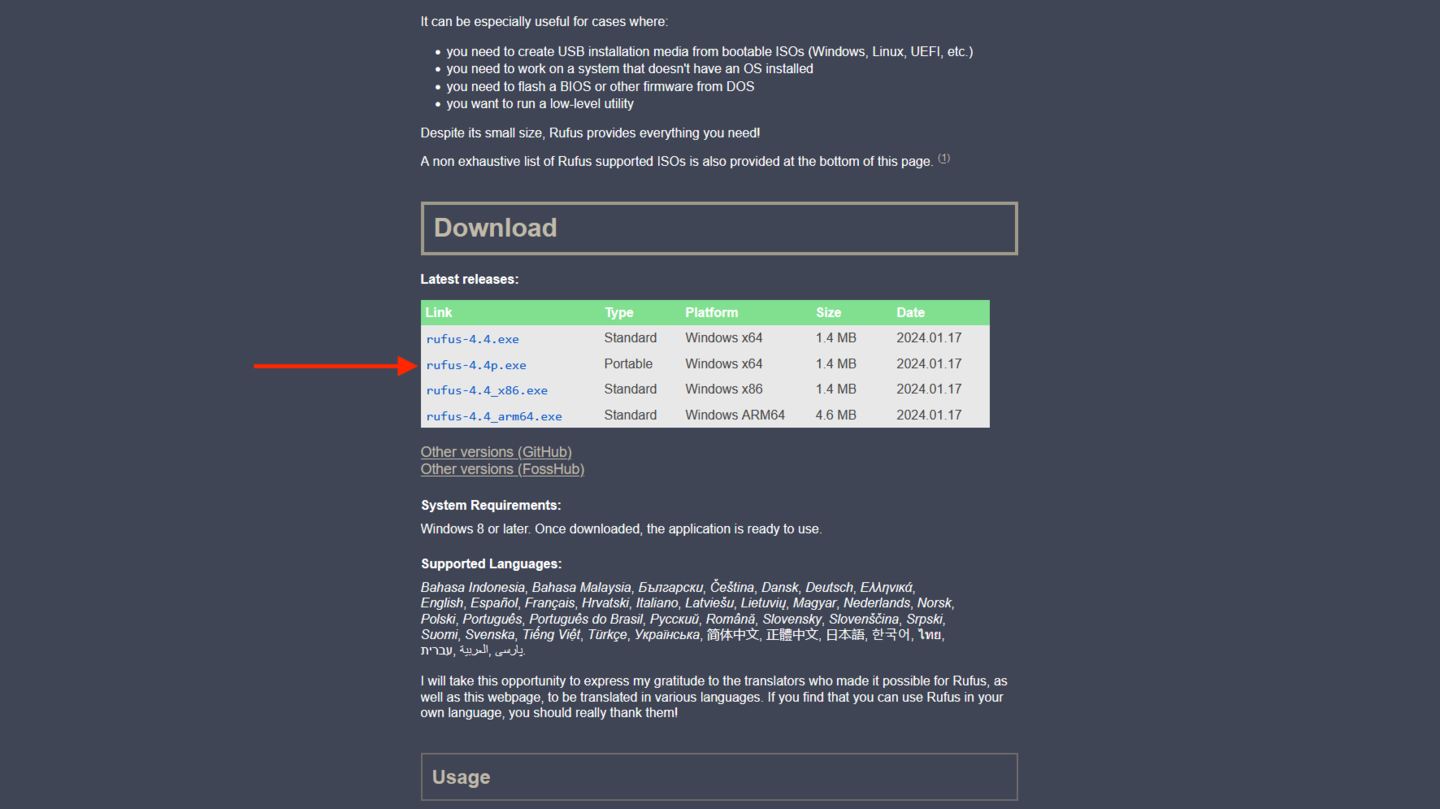
Download Rufus from the source mentioned above
Then run the installation file and start Rufus from the entry in the Start menu.
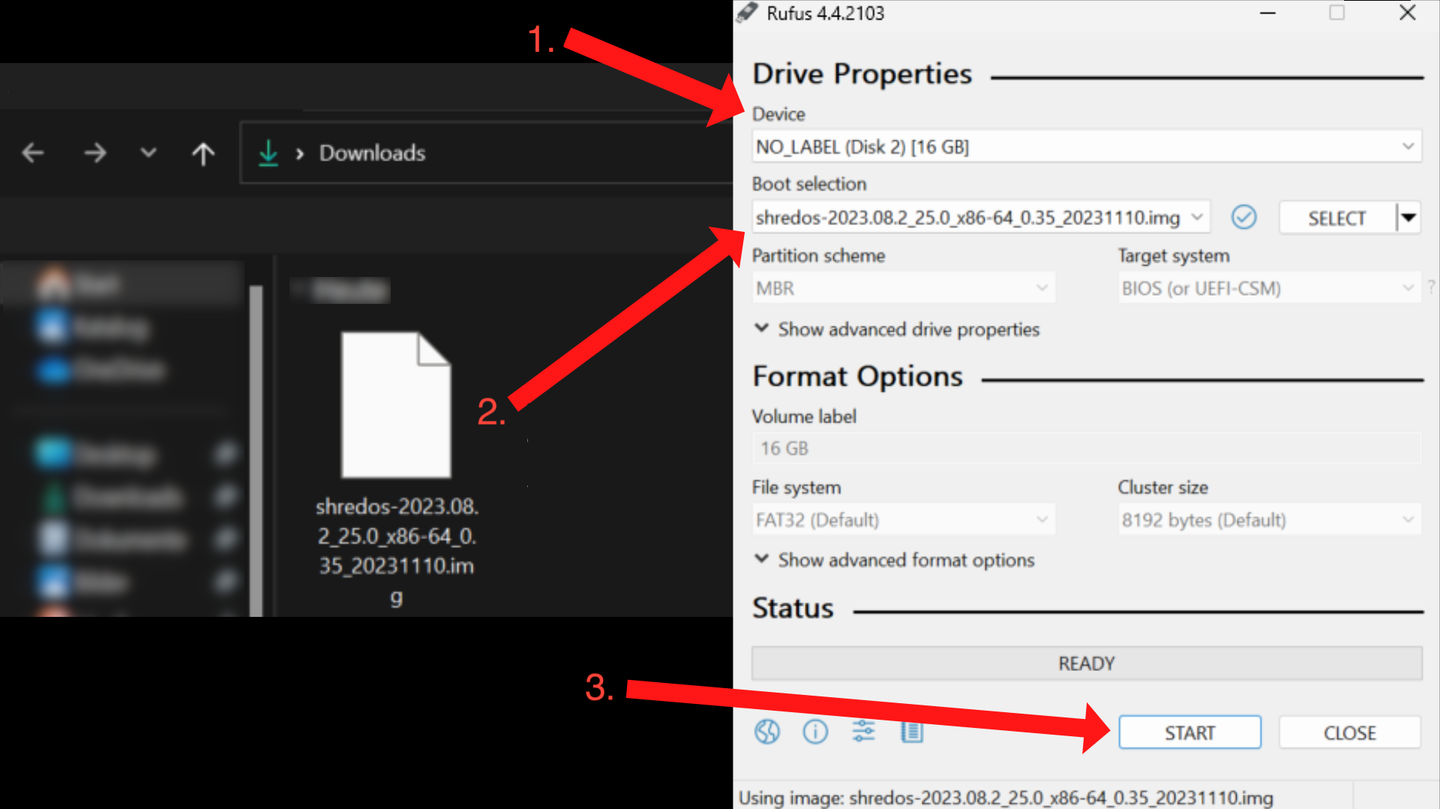
- Select the USB drive from which you want to create the USB boot stick (1)
- Add the previously downloaded ShredOS image file (2) via Drag and Drop. Alternatively, you can also add the file via the “Selection” button, but the image files are usually not recognized via this method.
- Start the writing process by clicking on Start (3).
Confirm the following prompt to start the writing process. Please note: Confirmation erases ALL data on the USB stick irretrievably.

Once the process has been completed, you can end Rufus.
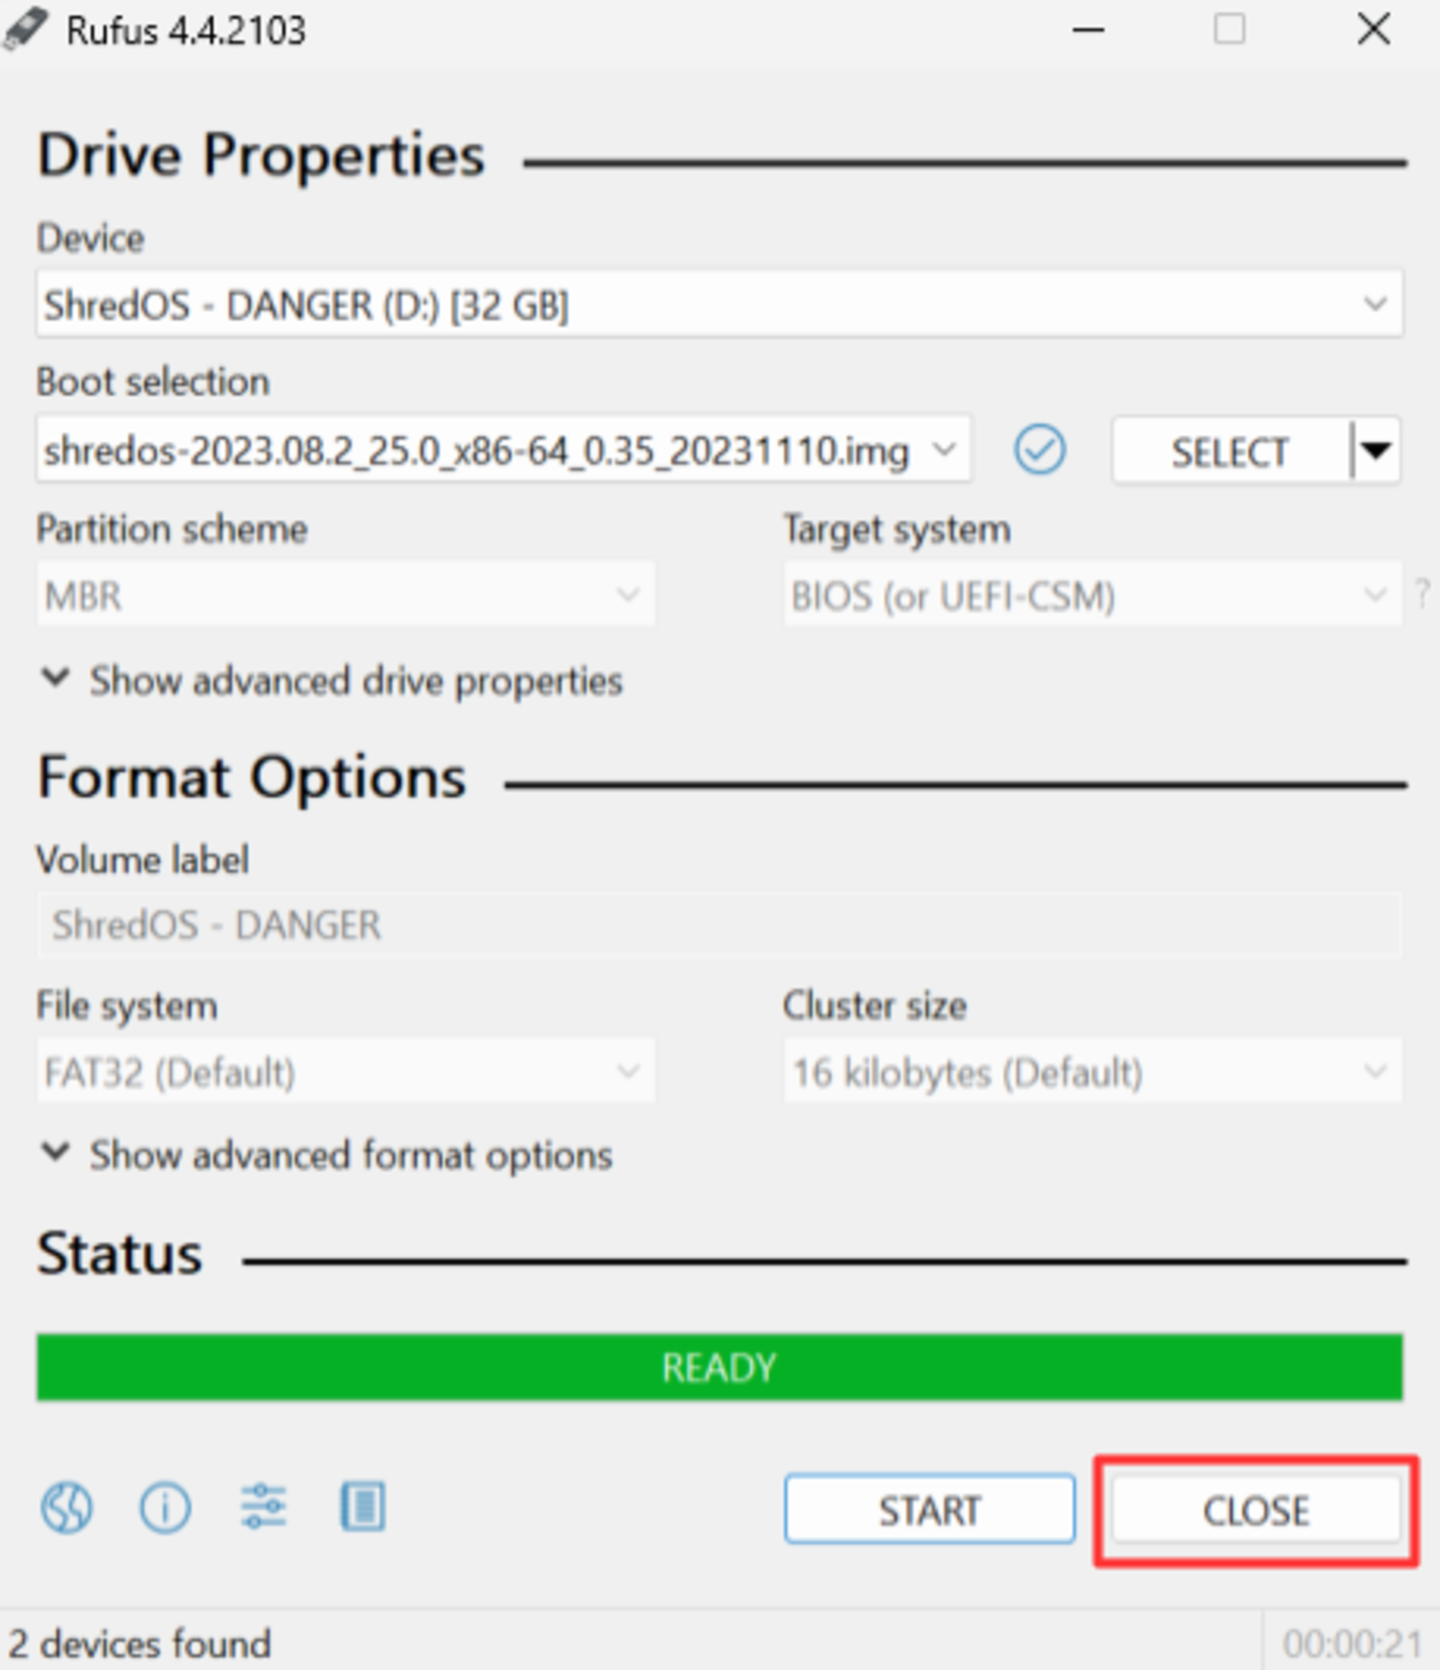
The USB boot stick is now ready for use.
Regarding number 2: Creating a USB bootstick under macOS (with Etcher)
Download Etcher from the above source. Please make sure to select the appropriate version for your system.
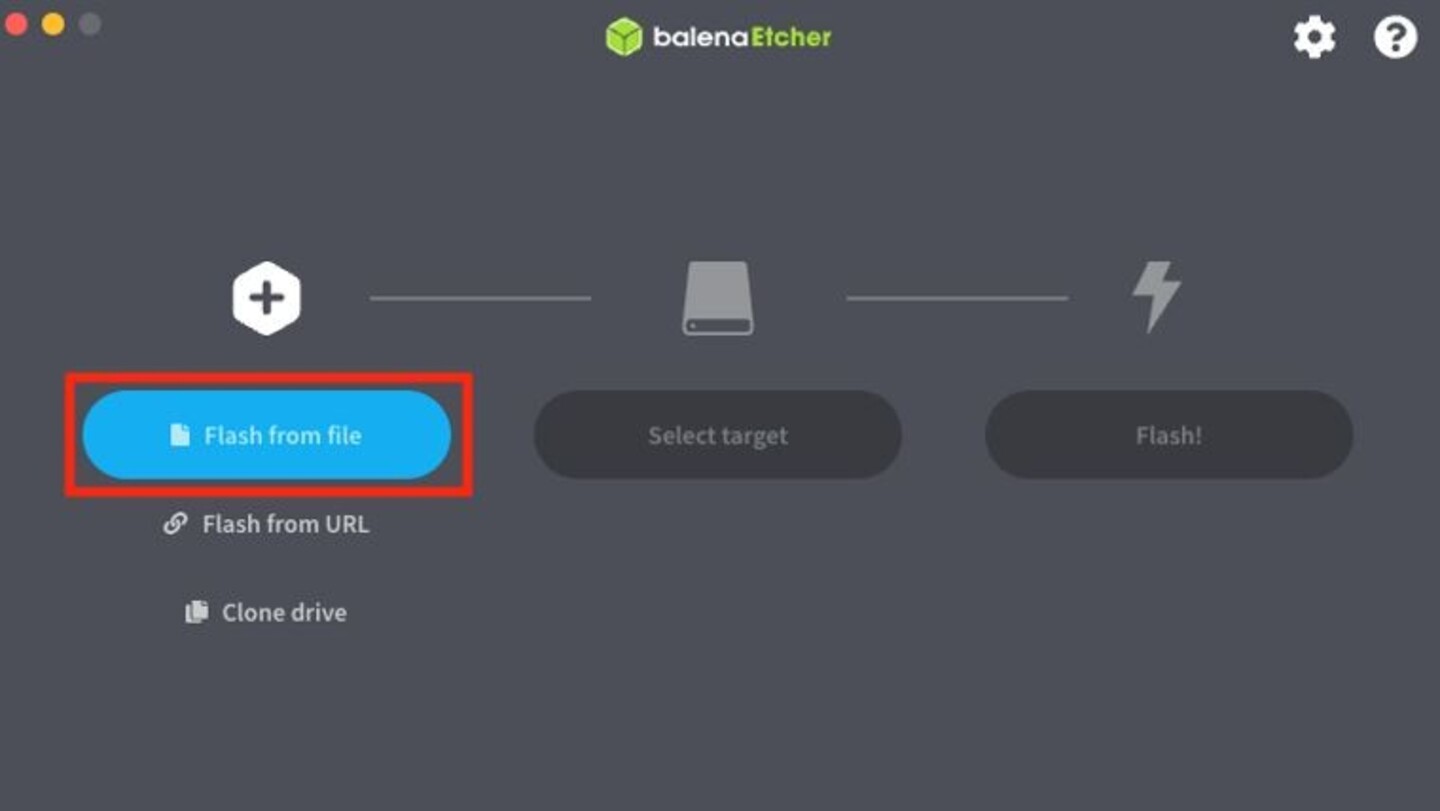
Then install Etcher and run the program. Select “Flash from file” and open the previously downloaded image file.
Then click on “Select target” and select the desired USB stick. Please note: All data on the selected USB stick will be permanently deleted.
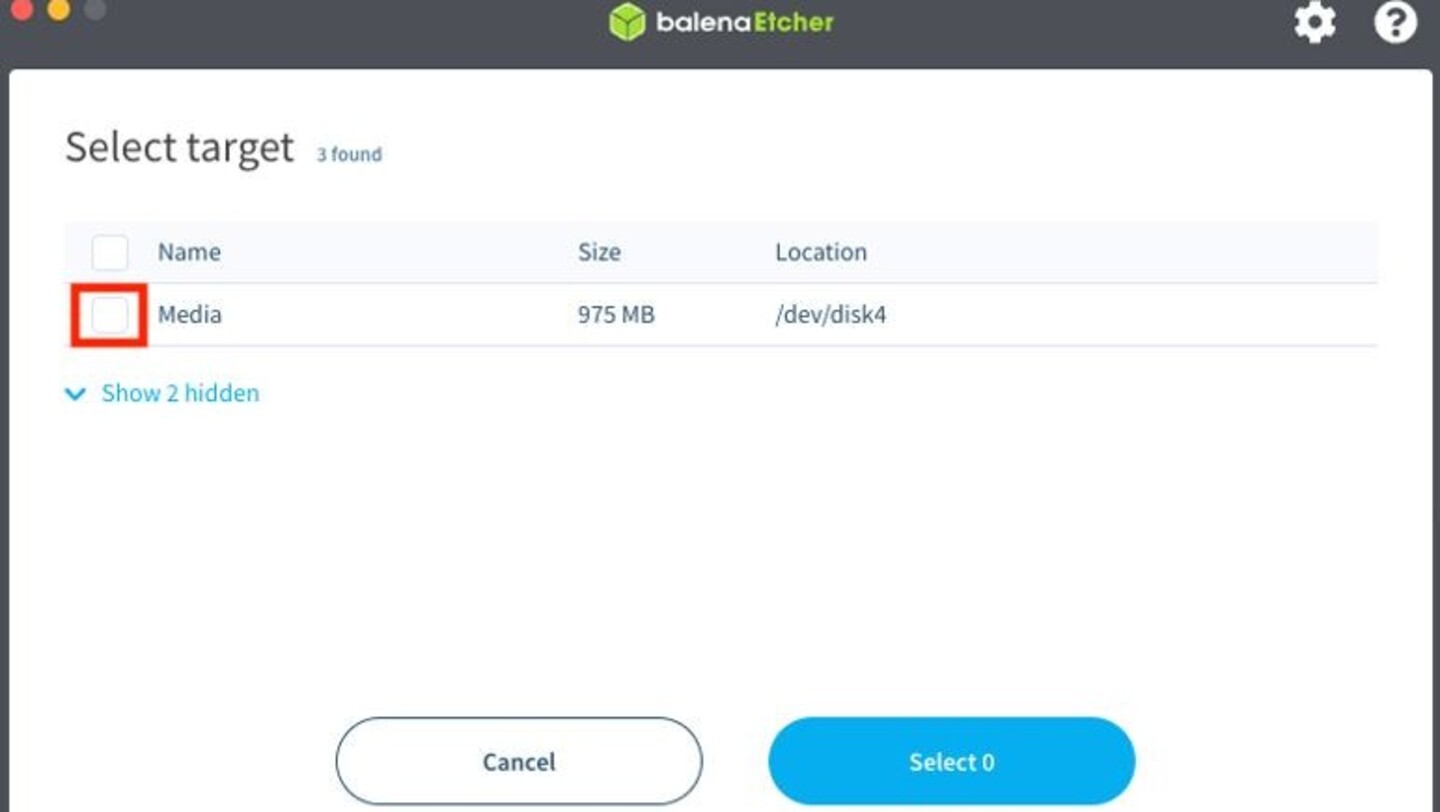
If your desired USB stick is not displayed, you can display additional storage media by clicking on “Show hidden”. Please note: This also displays system partitions and other important storage locations. Incorrect selection can severely damage your system.
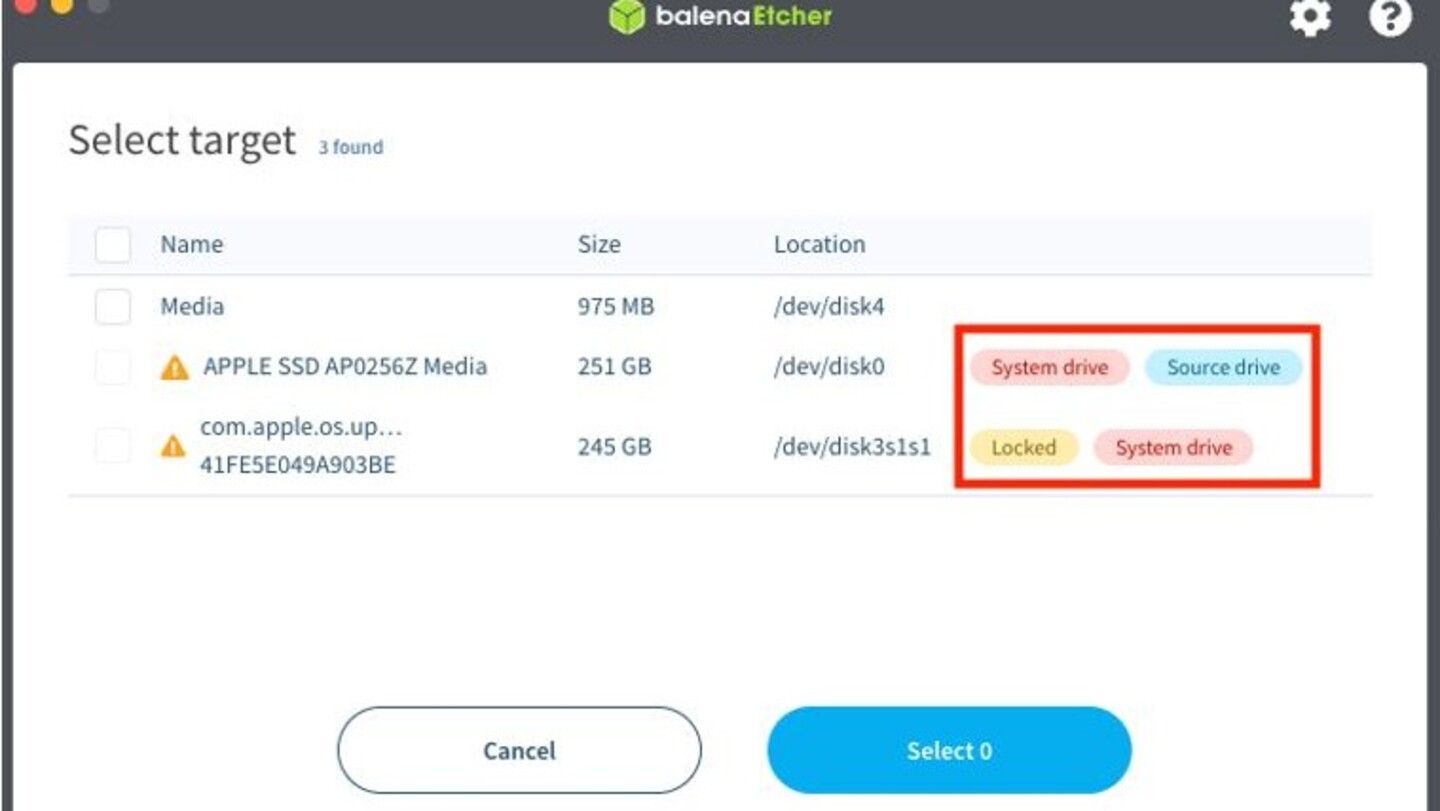
Note the highlighted locations – they provide important information about the meaning of the partitions.
To finish, please click on “Flash” – the writing process begins. You may be asked for an administrator password before the program can start writing.
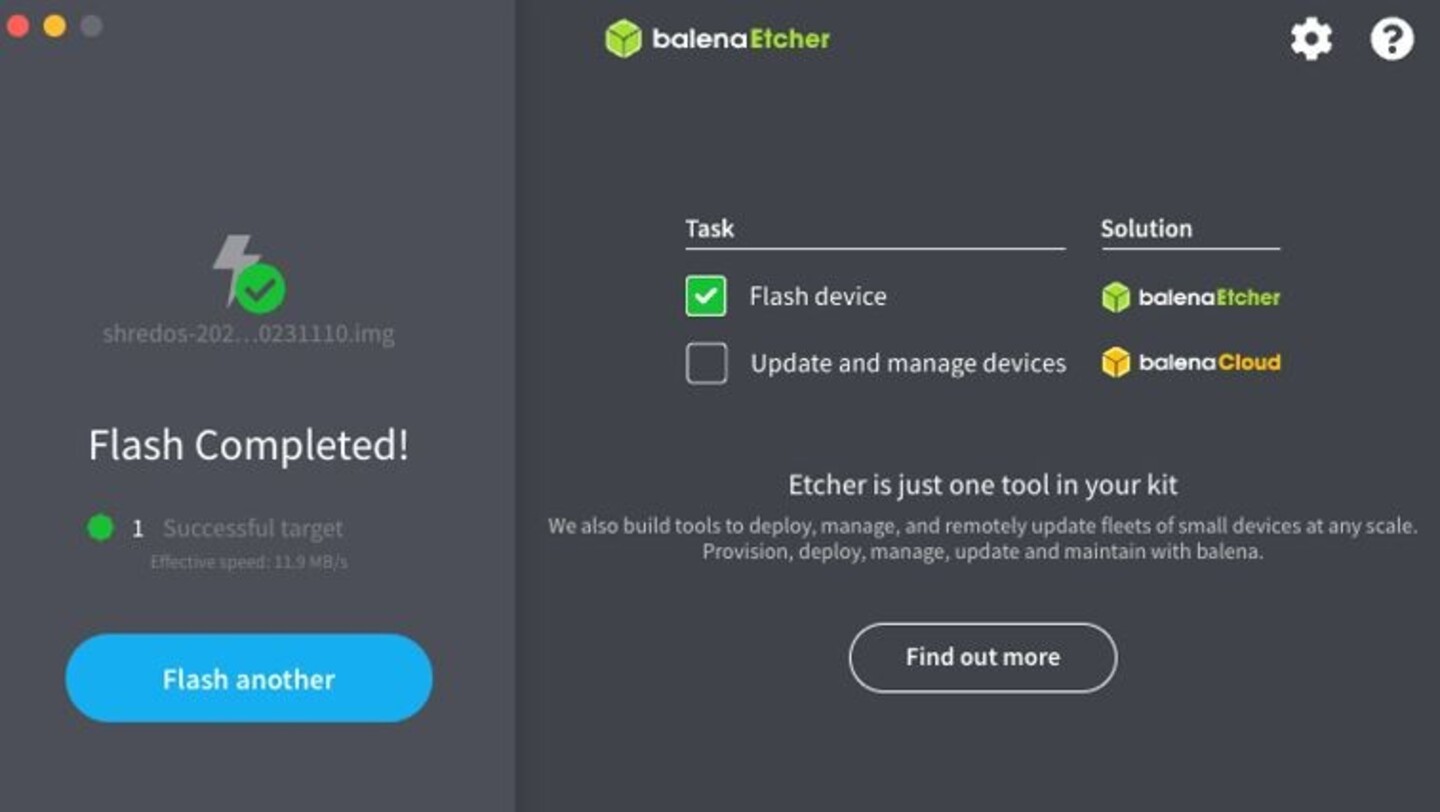
Once the flashing is complete, you can exit the program.
Erasing of a HDD:
- Remove the USB stick securely from the system and connect it to the PC from which you want to erase the hard drive.
- In the boot menu of your PC, select the USB stick as the boot drive. In most cases, you can access the boot menu directly after turning on the PC using the F12 key. If this does not apply to your system, please refer to your motherboard manual.
- Then ShredOS will start from the USB stick.
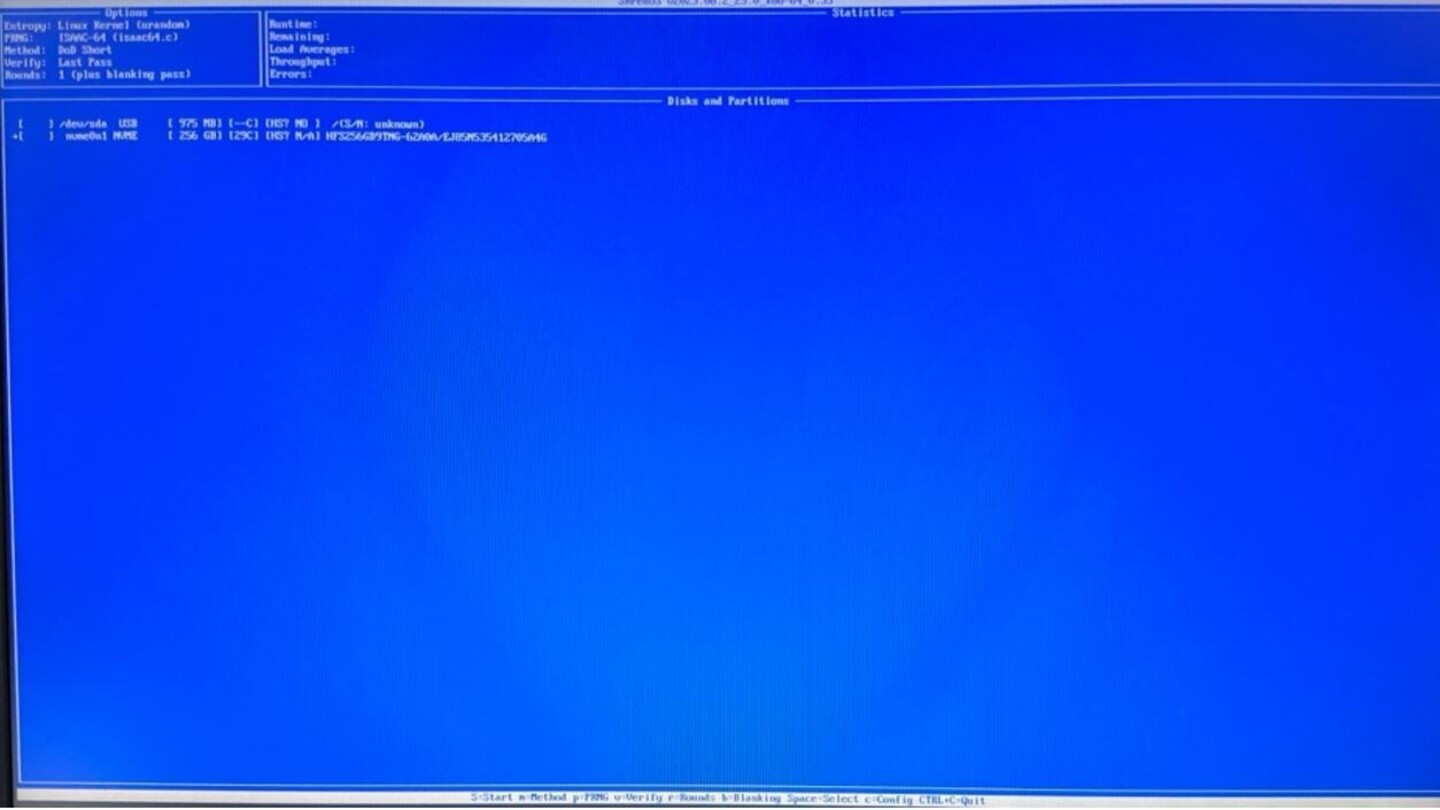
The desired disks can now be selected for deletion. To do this, use the arrow keys on the keyboard to switch between the hard drives and select them individually with the space bar. After you have selected all the desired disks, you can start the erase process by simultaneously pressing the Shift + S keys.
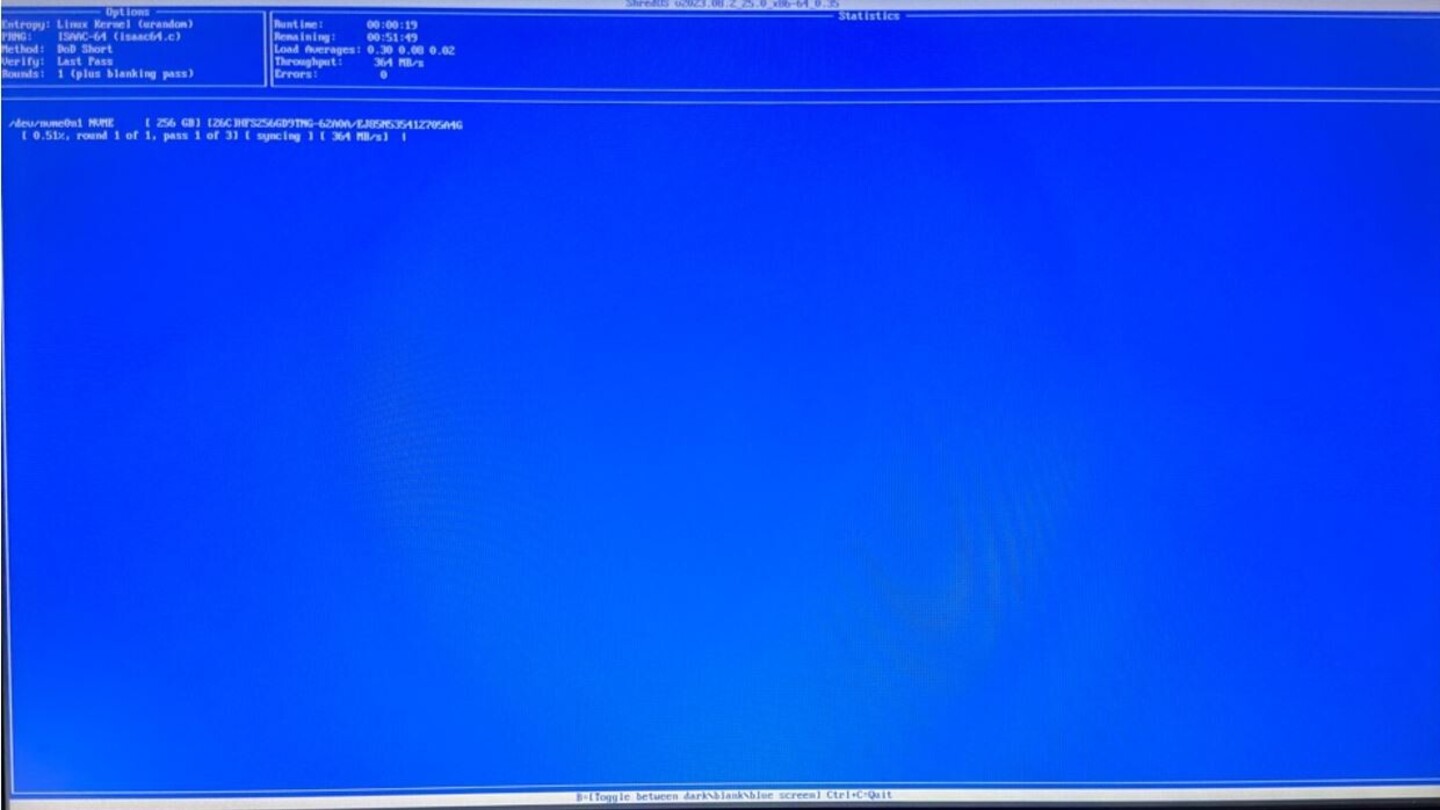
The program will now show you how far the deletion process has progressed. In this phase, you can already disconnect the USB stick from the PC and use it on another device, for example.
Securely erasing SSDs
Requirement: A Windows PC which has the SSD to be erased built in as an additional drive.
Unfortunately, erasing SSDs is not so trivial, because the internal structure and the type of data storage is completely different compared to traditional hard drives. To securely erase an SSD, the ATA Secure Erase command must be used. This is activated in a different way with each SSD. The software of the respective manufacturer is required for this. The required software for the most common manufacturers can be downloaded from the following pages:
Please note that, unlike a “traditional” HDD, the respective SSD must not be connected to the running computer via a USB adapter when executing the “ATA Secure Erase” command. Otherwise, the SSD could not function anymore and the data could not be erased correctly.