How do I use Zoom?
You can generally use Zoom in your web browser. However, the features are limited here. Zoom is responsible for the data traffic on its website. If you use Zoom in your web browser, the connection is not encrypted.
If you install the desktop application, you can use all features. We recommend the installation if you want to host a meeting.
On the Zoom website, you will find more information on the differences between the versions: https://support.zoom.us/hc/en-us/articles/360027397692-Desktop-client-and-mobile-app-comparison
Our IT Support is happy to help you installing Zoom on devices provided by the university.
Download
Tip
For security reasons, a current client version is required to use Zoom. The Zoom client is updated automatically every three months. To close critical security gaps, an update may also be issued outside of this schedule in exceptional cases. Since a restart is required after each update, we recommend that you open the Zoom client a few minutes before an upcoming video conference in case you need to restart it.
Who gets a personal Zoom license and how do you sign in?
Personal Zoom licenses are only available for (academic and non-academic) staff members of the University of Mannheim. Research assistants and students do not receive personal Zoom licenses.

Please note: A personal Zoom license is not required to participate in virtual events. Participation is possible without restrictions and disadvantages.
Where can I find the course link?
You will find the information required to participate in the meeting in the course details section on Portal²: On the details page of the relevant course, you can click on “show meeting links” (or alternatively “showing single dates”) in the “parallelgroup/appointments” tab.
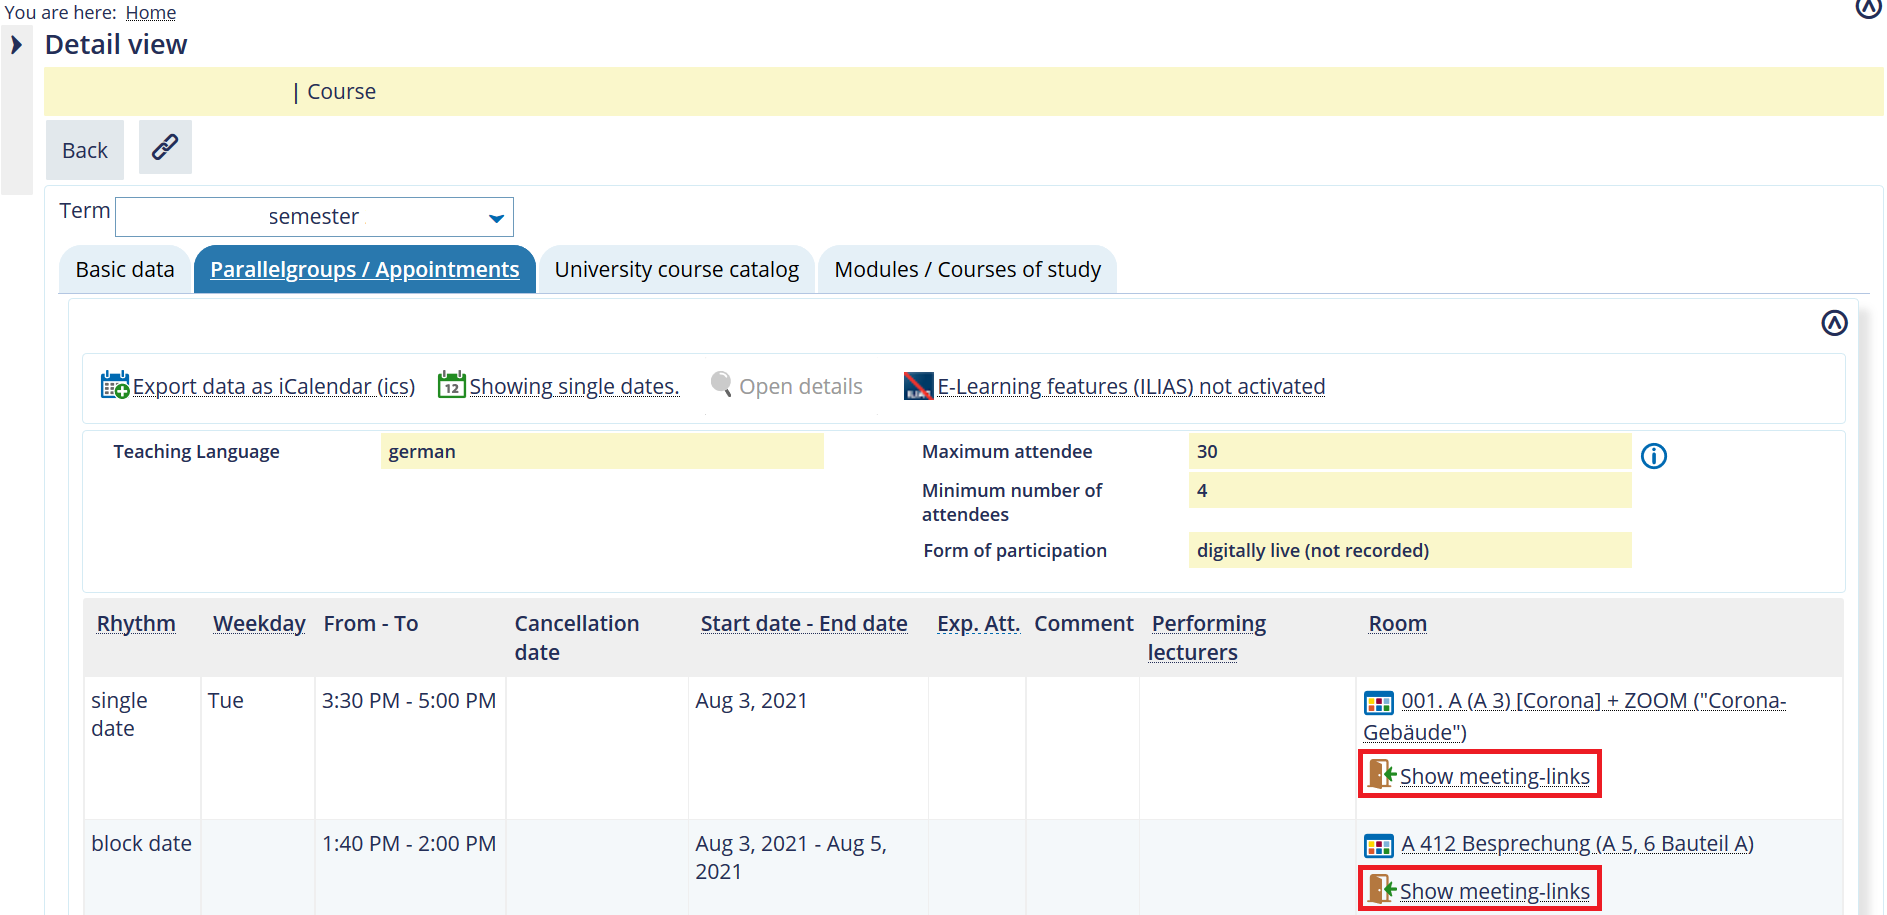
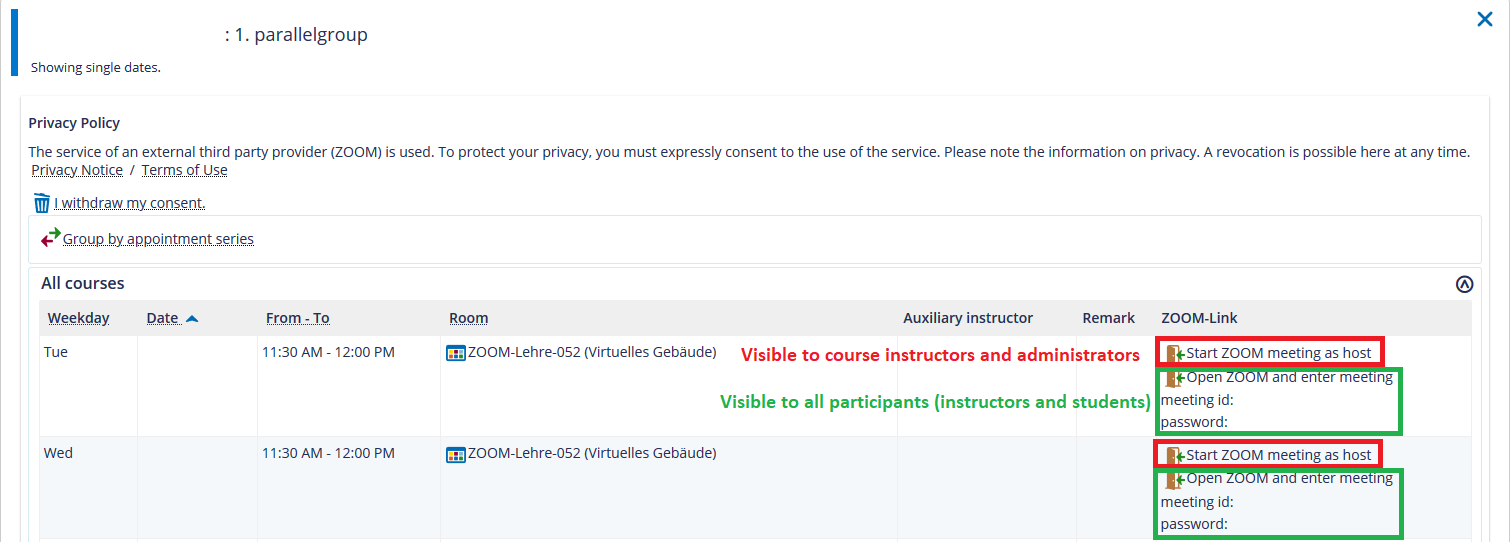
You will then receive an overview of all individual dates and appointment series for the course as an overlay. Once you have agreed to the Terms of Use, you will see the Zoom links. Please note that the host Zoom link does not appear until 60 minutes before the meeting.

How can I book a Zoom room?
Virtual courses
Please note: Zoom links only appear if the corresponding participation option is selected.
To book an course-specific Zoom meeting:
- Open the edit view of the course.
- Click on “Appointments & Rooms”.
- Click on the calendar-with-arrow symbol in the corresponding row.
Why are no course links displayed?
If you cannot access the course links via portal2 , please check the following settings.
1. Agree to the Terms of Use
The course links will not be displayed until you agree to the Terms of use (Data Protection Policy).
Select the “I agree to the use” box in the “Show individual events” tab in Portal2 under “Data Protection Policy”.
2. Check the participation options
To view the links, you must choose one of the following options:
- Live and on-campus & digitally live (not recorded)
- Digitally live (not recorded)
- Digitally live & recorded
- On-campus & digitally live – recorded
To do this, the basic data of the course must be changed in portal2: Detail view → Other features → Edit course → Edit basic data of the parallel group → Participation option
The change takes effect immediately and applies to all future classes. The Zoom links are displayed immediately and work. Once the setting is undone, all Zoom links are removed immediately.
3. Room features
In addition to checking the correct participation option, it must also be ensured that the room provides the correct features for the links to be displayed.
Use Portal 2 to make sure that “Zoom” is listed in the room details under “Equipment” in the lecture hall you have selected.
You can also conduct an in-person course with a Zoom meeting in a room without the appropriate lecture hall equipment (i.e. with your own laptop). To do this, you must first book the actual room in Portal² as usual. To book and display the Zoom meeting, another series of appointments must be created in the course: To do this, create a second parallelgroup with identical appointments and select “Create Zoom meeting”.
What do I need to keep in mind when inviting others to join a meeting?
- Members of the University of Mannheim should access Zoom meetings via Portal². If you access the link via Portal² or the host shares the link specified in Portal² with you, you do not need to enter a Zoom password. However, you need to agree to the terms of use.
- Participants, who are not members of the university, need the zoom.us link (and the corresponding password) or must be invited to enter the virtual room during the meeting. The link is made up of uni-mannheim.zoom.us/j/ and a 10-digit combination. This information is specific for each room and can be found in the room details in Portal².
Please note: If required, the Zoom link can also be included as a web link on ILIAS or shared via the ILIAS mailing feature.
- Please disclose information on the course only to the participants and do not publish the data on the Internet.
- Non-members of the university who join the meeting have to have access to the terms of use.
What are the basic Zoom features?
Basic features
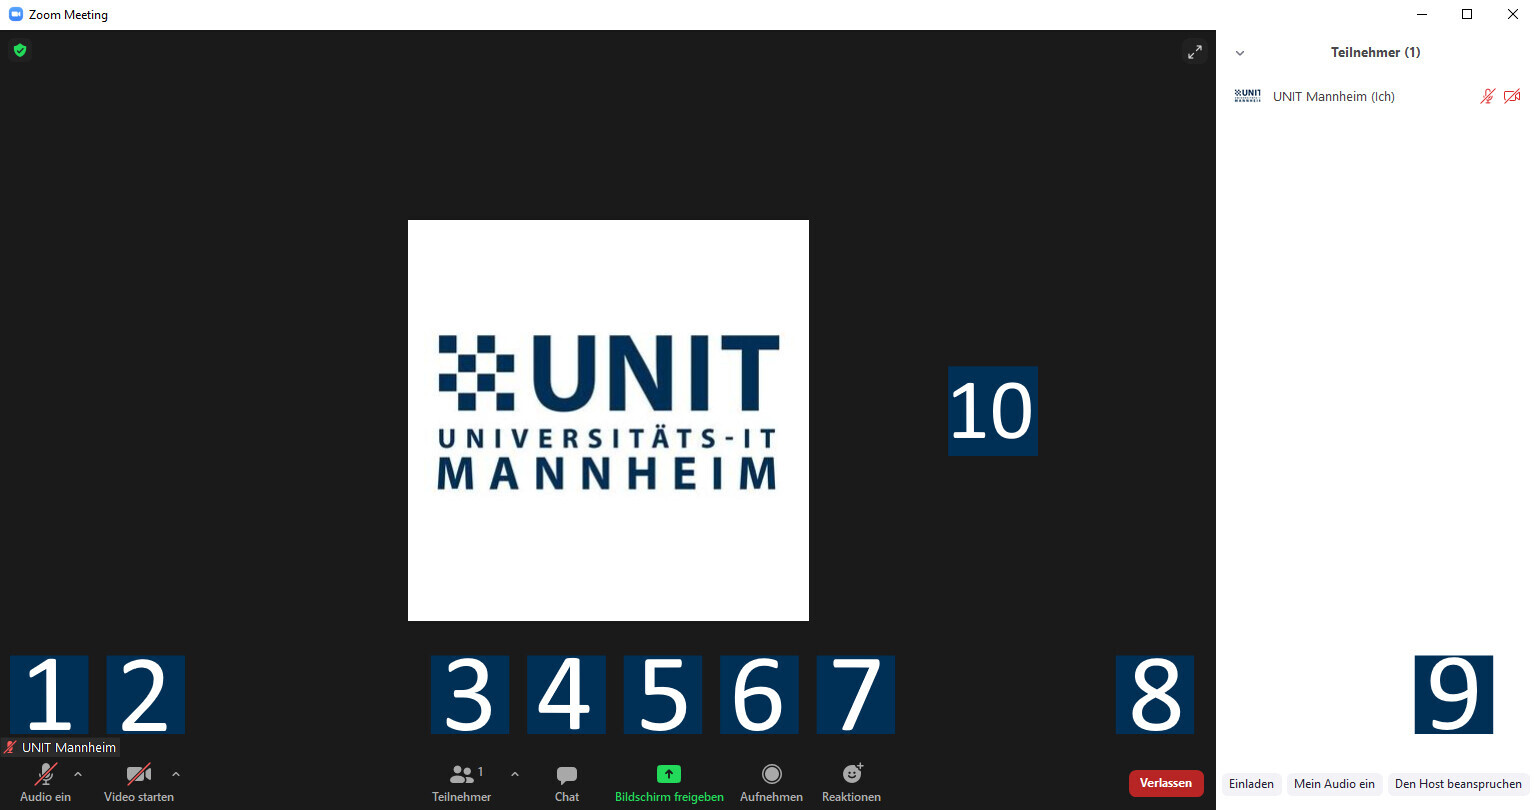
1) Turn microphone on/
off
2) Turn camera on/off
3) Show and manage list of participants
4) Open chat window
5) Start screen sharing
6) Recording a meeting (local)
7) Reactions (non-verbal feedback)
8) Leave meeting
9) Become host of the meeting (host key required)
10) Video areaHow do I take over as a host?
To host you will need either the host key or the course link for hosts.
Login with host key
- Hosting is possible with a host key. You can find the host key via ILIAS → Digitalisierung in der Lehre.
- It is possible to register for hosting via the link for hosts. The link can be found in Portal² in the details of the course which you can edit yourself (e.g. as a department admin or as a teacher of the event). You can find the host link in the course details (single dates) under “parallelgroup/appointments”.
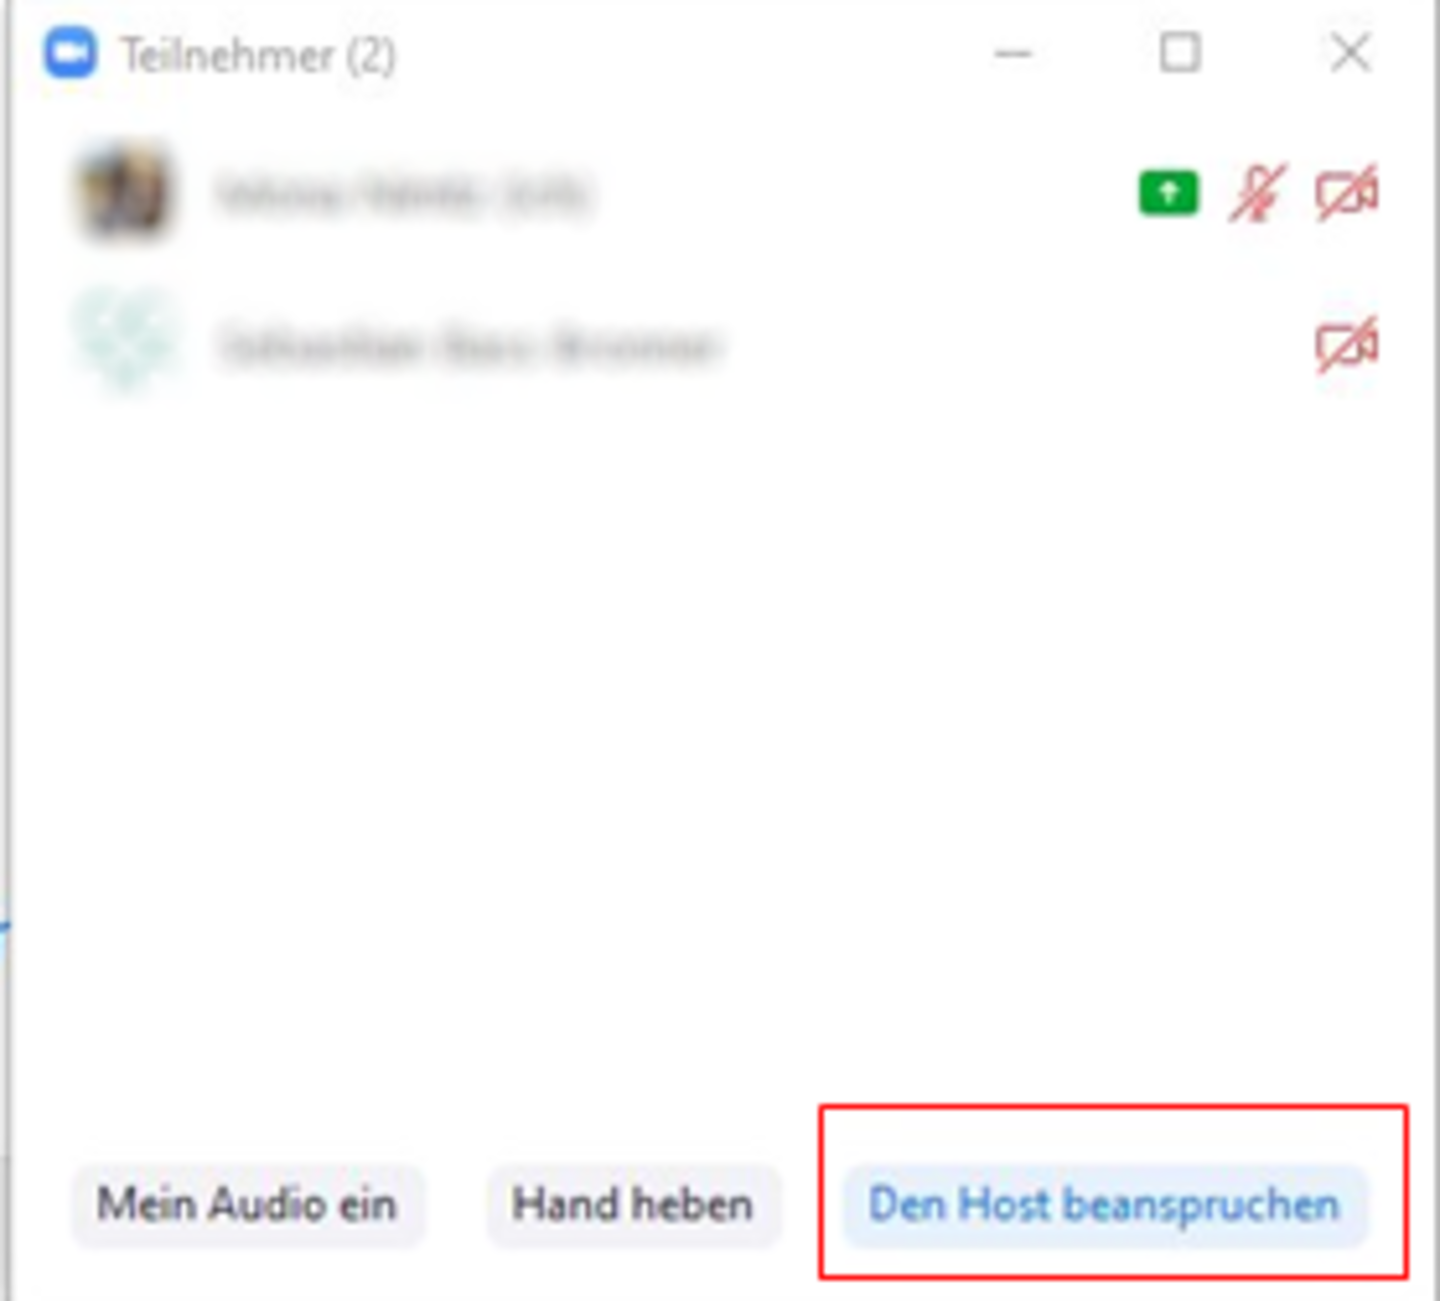
If you have trouble accessing the host meeting link, you can join the meeting using the normal link for participants (“Open Zoom and join meeting”) and claim host rights.
If there is no host yet in the virtual room, you can obtain the hosting rights by entering your host key. This option is called “Claim Host” and can be found in the menu under “Participants” at the bottom right.
If a host is already logged in, only they have the possibility to name additional hosts.
The tasks and options of the host(s) are summarized in the Information on Hosting a Meeting on Zoom.
How do I record a Zoom meeting?
Please observe the requirements specified in the Terms of Use for Zoom as well as the Information on Hosting a Meeting on Zoom. The transcription is currently unavailable because it is part of cloud storage, which had to be disabled for data protection reasons.
Prepare recording
Before you start recording, please inform the participants about the following:- This meeting will be recorded
- participants who do not want to be recorded need to turn off their cameras and mute their microphones
- if participants say something, they will become part of the recording
If participants use the chat feature, please make sure that you do not mention their names, otherwise they become part of the recording without having given their consent.
Please use the “share screen” feature to select the application you want to share. Then you adjust the camera view of the participants so that the participants only see the video of the person who is currently speaking.

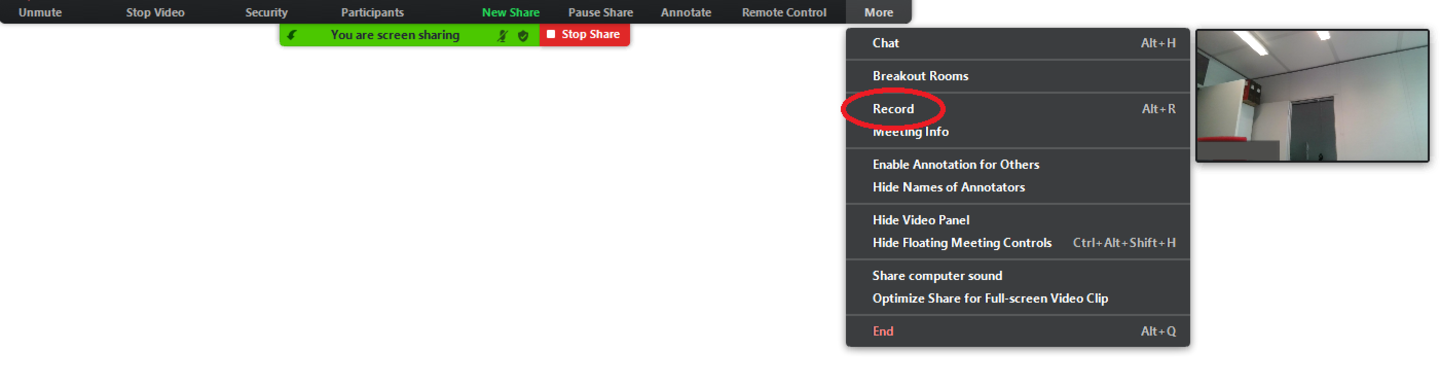
Recording
You can start recording in the menu at the top of the screen.- The option “Pause recording” will pause the recording and you can continue recording at a later point in time.
- The option “Stop recording” will end and save the recording.
Stop recording
When you end the Zoom meeting, a dialog box will appear and you can select a storage location. Please note that this may take a while, depending on the length of your recording. You will receive the recorded session as an MP4 file with a resolution of 720p.
Please note: Zoom images taken outside the lecture hall are not automatically uploaded to Opencast. The recordings are only stored locally on the individual end device. Manual recording in Opencast is necessary. For tips on implementation, see the video tutorial.
How do I use breakout sessions?
Breakout sessions allow you to split your class into separate groups. You can divide up the course participants either automatically or manually and switch between the sessions at any time. To do so, use the button “Breakout Session” in your meeting toolbar.

Clicking this button will start the division of your class. A window will open in which you can adjust the breakup settings. You also have the option of reassigning the participants to different sessions or to interrupt or terminate the breakup.
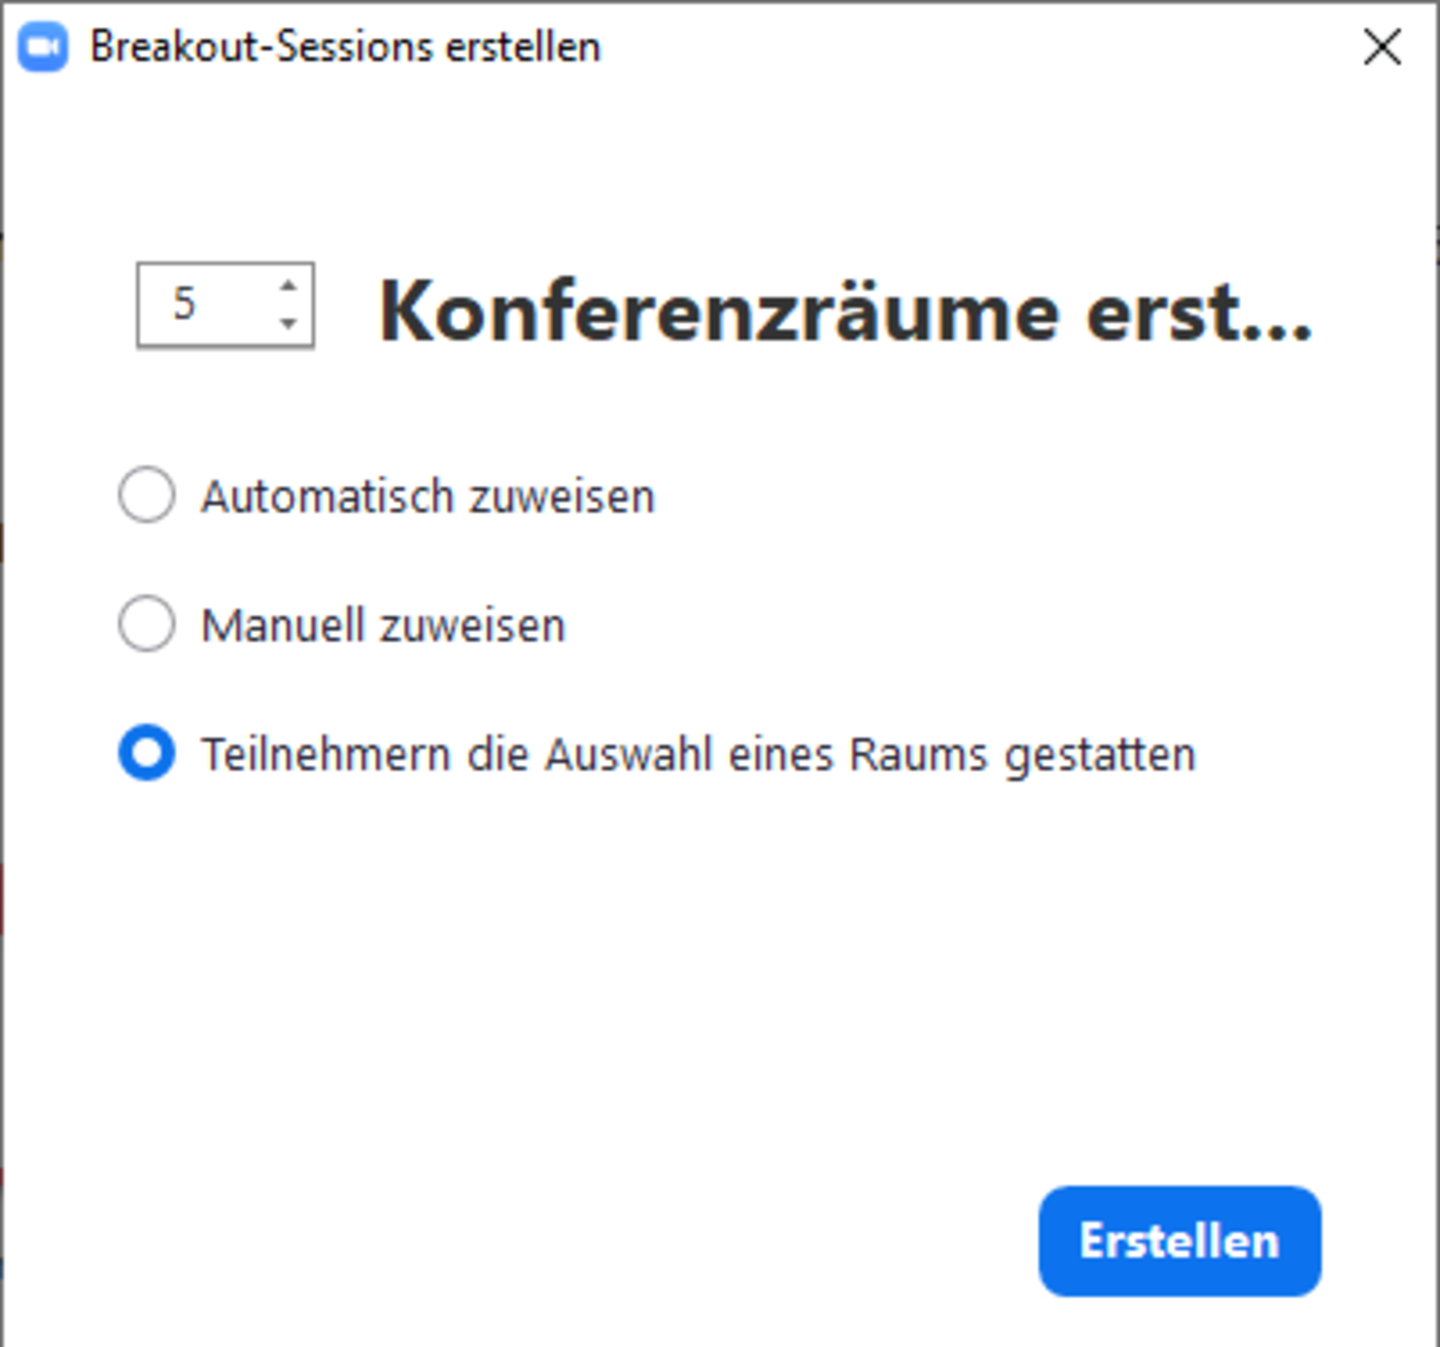
If you want to allow participants to switch between sessions, you need to select the “Allow participants to choose rooms” option when creating sessions.