How to Add an Exchange E-mail Account to a Windows Computer / Laptop
In these instructions, we will show you how you can add your Exchange mail account to an e-mail program on your Windows device. You can only use these instructions, after your Exchange mailbox has been created.
Outlook instructions
Thunderbird instructions
Windows Mail app instructions
Information: We recommend using Outlook as e-mail client so that you can use all features of your Exchange mailbox (such as calendars or address books). When other alternative e-mail clients (Thunderbird, for example) are connected with your Exchange mailbox, the features may be limited and may require add-ons. There is no guarantee that these add-ons will be updated or will work in future. Due to this, the University IT only offers extensive support for Outlook.
Please note that, as of April 2026, only the integration of Outlook Classic is permitted, and Outlook New should not be used.
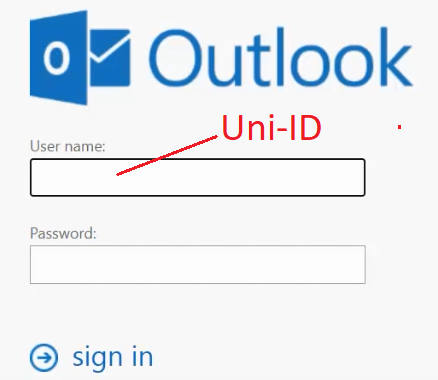
You can also access your Exchange mail box via web browser at https://exchange.uni-mannheim.de if you do not want to install a client on your computer. In this case, please login with your Uni-ID and the corresponding password.
Adding your e-mail account to Outlook
Instructions for Microsoft Outlook 365
When you first connect Outlook on your computer/
laptop with the Exchange e-mail account, please perform the following steps once: 1. Download the file “Outlook Autodiscovery RegKey setzen.bat” :
Download Outlook Autodiscovery RegKey.batPlease install Outlook 365 before downloading the file.
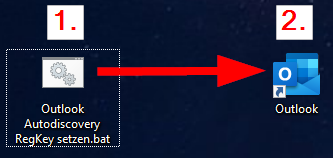
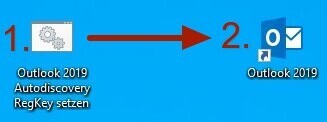
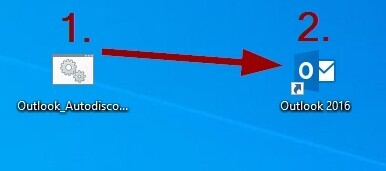
2. Execute the file “Outlook Autodiscovery RegKey setzen.bat” by double-clicking on the file:
- If the file is blocked by Windows Defender or another antivirus software, please allow the file to be executed.
- If you see a black command window, enter “j” into the window and confirm by clicking Enter.
3. Open your Internet browser (e.g. Firefox or Chrome) and go to https://exchange.uni-mannheim.de.
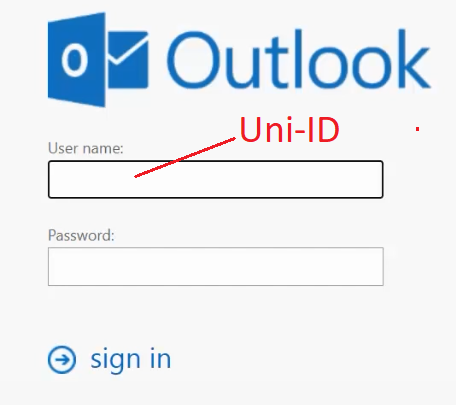
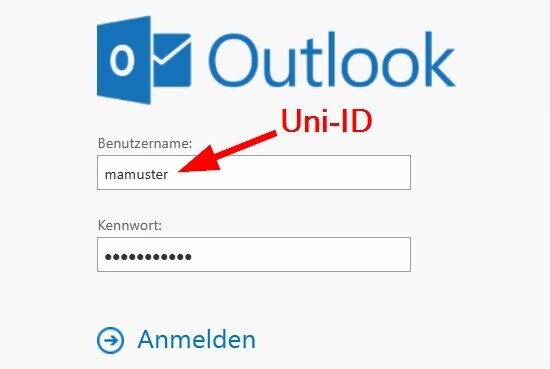
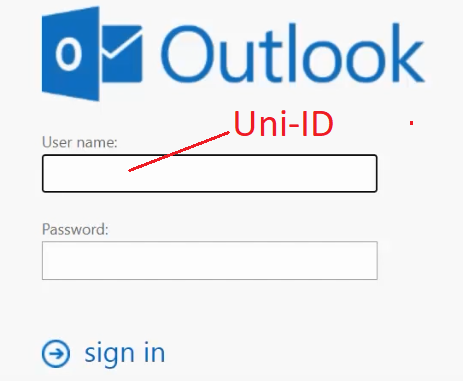
4. Enter your Uni-ID and the corresponding password and click on the “Login” button:
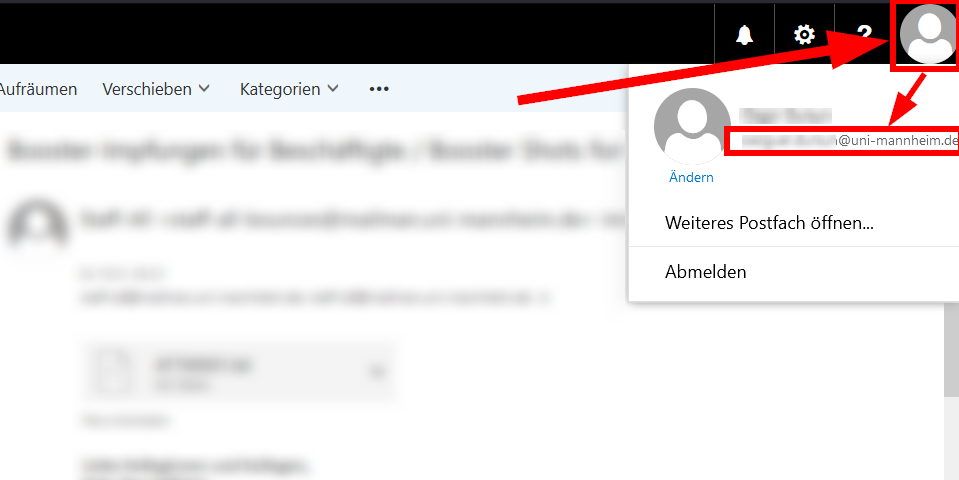
5. After the login, click on the profile picture in the upper right corner. Your e-mail sending address will be displayed in the pop-up window that opens:
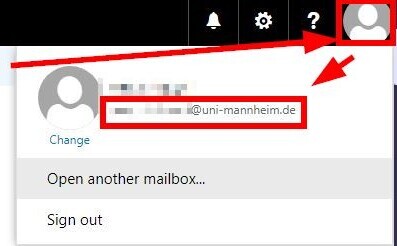
6. Please write this address down -> This is your Exchange sending e-mail address which you will need for the connection.
In order to connect Outlook 365 to your new account, please proceed as follows:
1. Start Outlook 365 on your computer.
If you start Outlook for the first time, you will automatically be requested to connect an account.
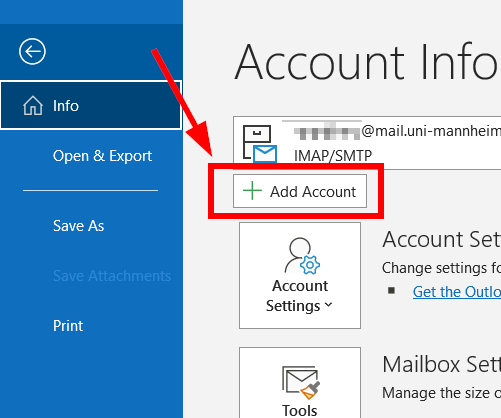
Then click on the the “File” tab: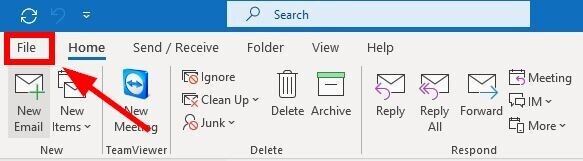
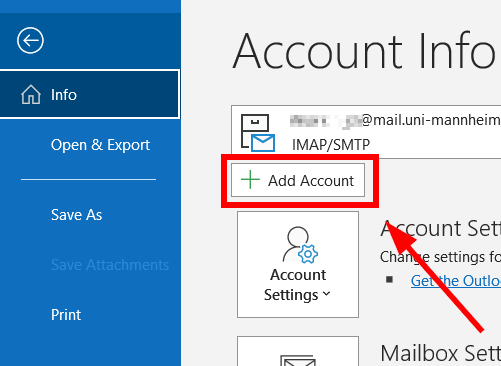
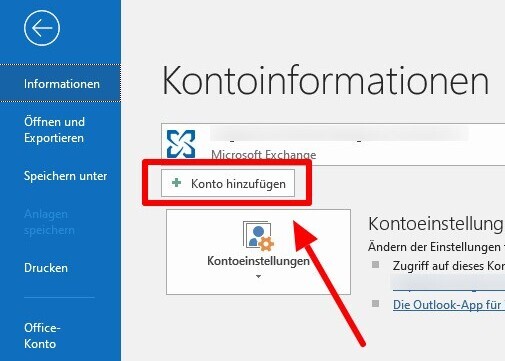
2. Then click the “+ Add account” button:
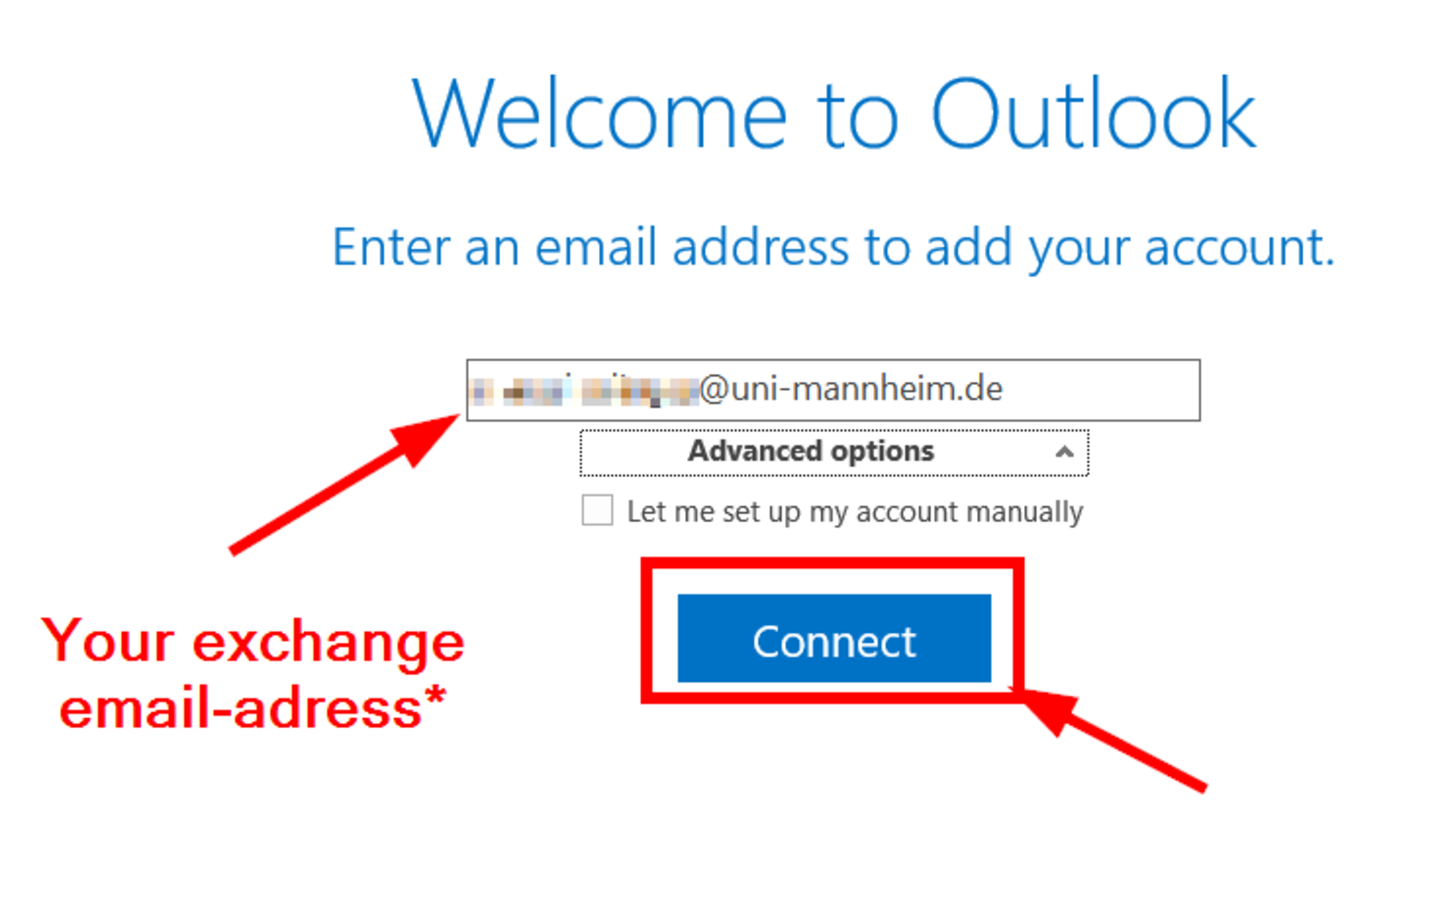
3. Please enter your Exchange e-mail address*. Then click “Advanced options”, check the box indicating you want to manually set up your account and proceed by clicking “Connect”:
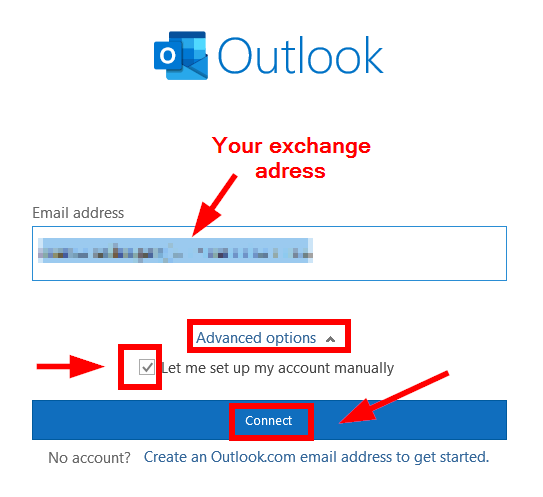
*See steps 3–6 of the initial steps above
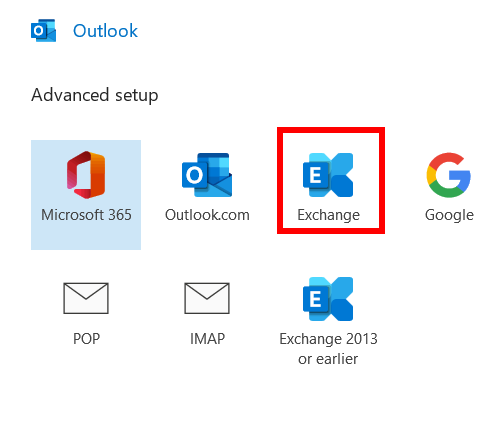
4. In the window that appears next, select “Exchange”:
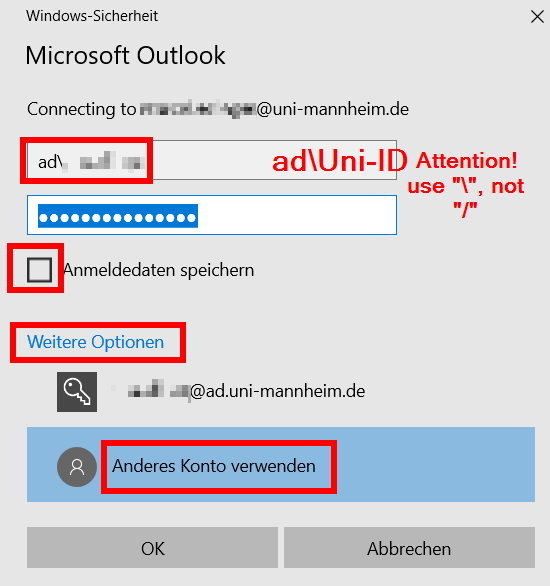
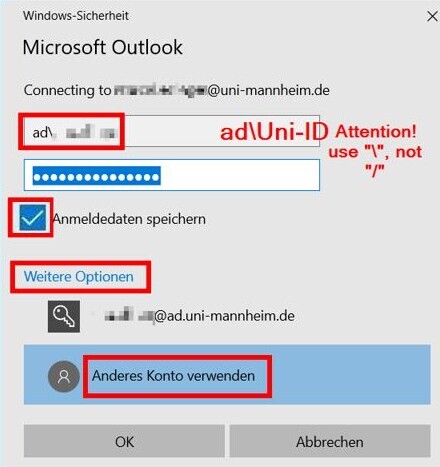
5. Please proceed as follows in the login window that appears next:
- Open “Advanced settings” --> “Use other account”.
- Then enter your Uni-ID (= previously “user ID”), preceded by “ad\“ and your password.
Important: Please make sure to use “\“ and not ”/“. - Check the box “Save login information” and continue by clicking “Ok”:
6. If another pop-up appears, please confirm this by clicking “OK”:

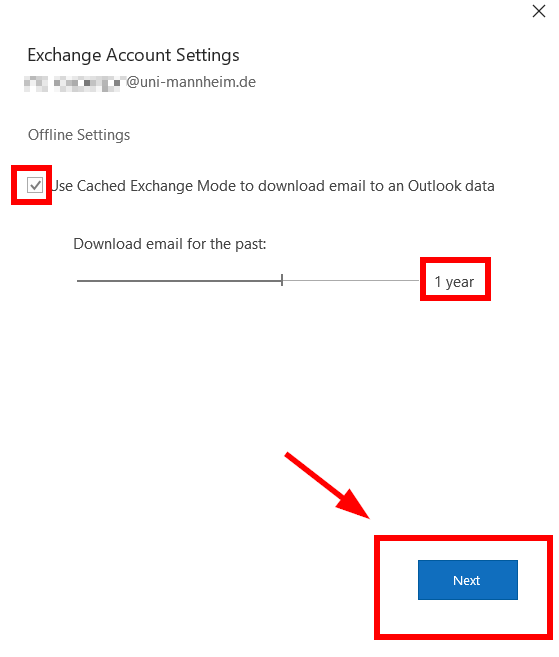
7. Leave the box “Use the Exchange cache mode ,[..]“ ticked, do not change the download option which is set to “one year” and then click “Next”:
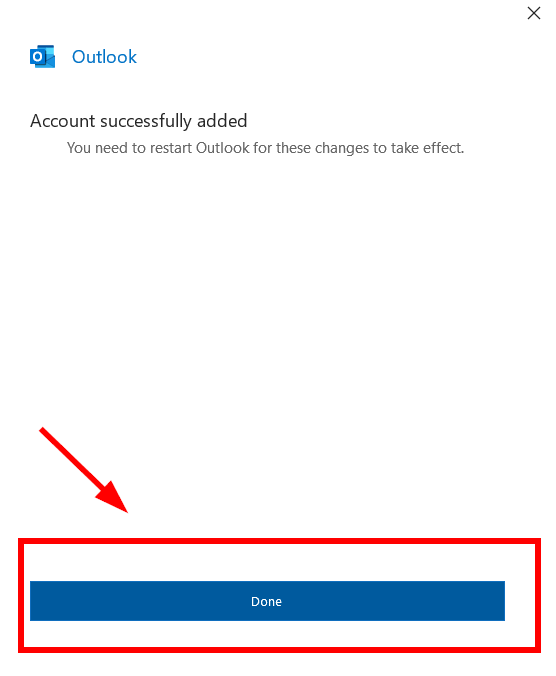
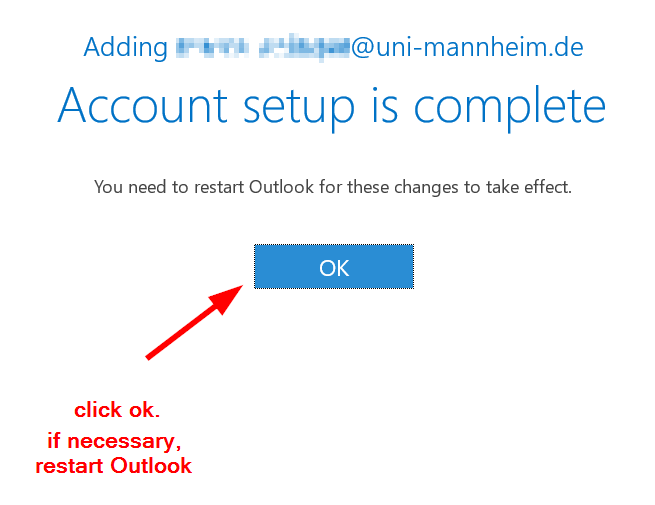
8. In the following window, confirm by clicking “Process completed”:
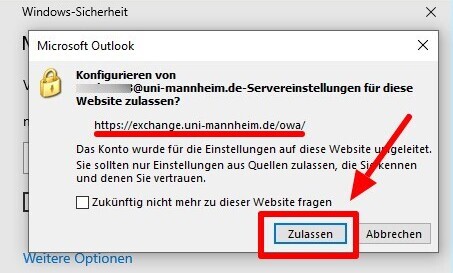
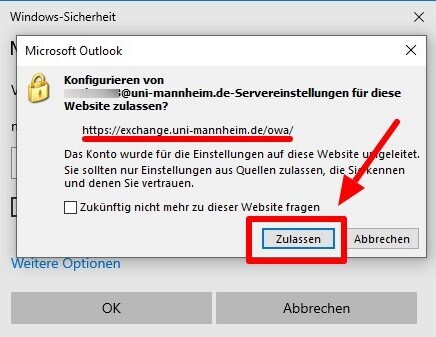
9. Then you may be requested to allow the page exchange.uni-mannheim.de to make changes to the settings of your account. Please confirm this request:
10. Close Outlook and re-start the program. Your mailbox will then be synchronized and you have successfully added your account.
Instructions for Microsoft Outlook 2019
When you first connect Outlook on your computer/
laptop with the Exchange e-mail account, please perform the following steps once: 1. Download the file “Outlook Autodiscovery RegKey setzen.bat”:
Download Outlook Autodiscovery RegKey setzen.bat
Please install Outlook 2019 before downloading the file.2. Execute the“Outlook Autodiscovery RegKey setzen.bat” by double-clicking on the file:
- If the file is blocked by Windows Defender or another antivirus software, please allow the file to be executed.
- If a black console window opens, please confirm this by clicking the enter key.
3. Open your Internet browser (e.g. Firefox or Chrome) and go to https://exchange.uni-mannheim.de.
4. Enter your Uni-ID and the corresponding password and click on the “Login” button:
5. After the login, click on the profile picture in the upper right corner. Your e-mail sending address will be displayed in the pop-up window that opens:

6. Please write this address down -> This is your Exchange sending e-mail address which you will need for the connection.
In order to connect Outlook 2019 and your new account, please proceed as follows:
1. Start Outlook 2019 on your computer.
If you start Outlook for the first time, you will automatically be requested to connect an account.
Then click on the the “File” tab: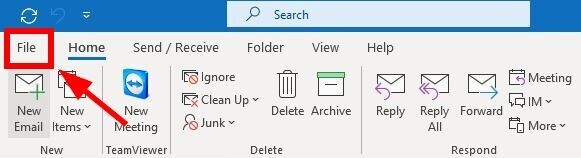
2. Click on the “+ Add account” button.
3. Please enter the Exchange e-mail address* here:
*See steps 3–6 of the initial steps above
4. You may be requested to allow the page exchange.uni-mannheim.de to make changes to the settings of your account. Please confirm this request:
5. Please proceed as follows in the login window that appears next:
- Open “Advanced settings” --> “Use other account”.
- Then enter your Uni-ID (= previously “user ID”), preceded by “ad\“ and your password. Important: Please make sure to use “\“ and not ”/“.
- Check the box “Save login information” and continue by clicking “Ok”:
6. Outlook will connect to your new mailbox and a message that the account has been set up will appear. Uncheck the box “Setup Outlook Mobile on my phone” and click “OK”:
7. You may have to end and re-start Outlook in order to add and synchronize your new account.
Instructions for Microsoft Outlook 2016
When you first connect Outlook on your computer/
laptop with the Exchange e-mail account, please perform the following steps once: 1. Download the file “Outlook Autodiscovery RegKey setzen.bat”:
Download Outlook Autodiscovery RegKey setzen.bat
Please install Outlook 2016 before downloading the file.2. Execute the“Outlook Autodiscovery RegKey setzen.bat” by double-clicking on the file:
- If the file is blocked by Windows Defender or another antivirus software, please allow the file to be executed.
- If a black console window opens, please confirm this by clicking the enter key.
3. Open your Internet browser (e.g. Firefox or Chrome) and go to https://exchange.uni-mannheim.de.
4. Enter your Uni-ID and the corresponding password and click on the “Login” button:
5. After the login, click on the profile picture in the upper right corner. Your e-mail sending address will be displayed in the pop-up window that opens:
6. Please write this address down -> This is your Exchange sending e-mail address which you will need for the connection.
If you want to link Outlook 2016 and your e-mail account, please proceed as follows:
1. Start Outlook 2016 on your computer.
If you start Outlook for the first time, you will automatically be requested to connect an account.
Then click on the the “File” tab: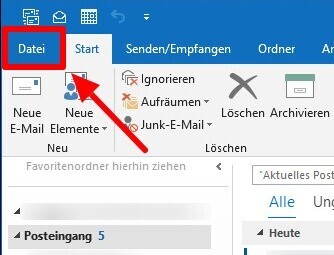
2. Then click the “+ Add account” button:
3. Enter your first name and your last name, your Exchange sending address* and the password of your Uni-ID (= formerly known as “user ID”). Then click “Next”:

*See steps 3–6 of the initial steps above
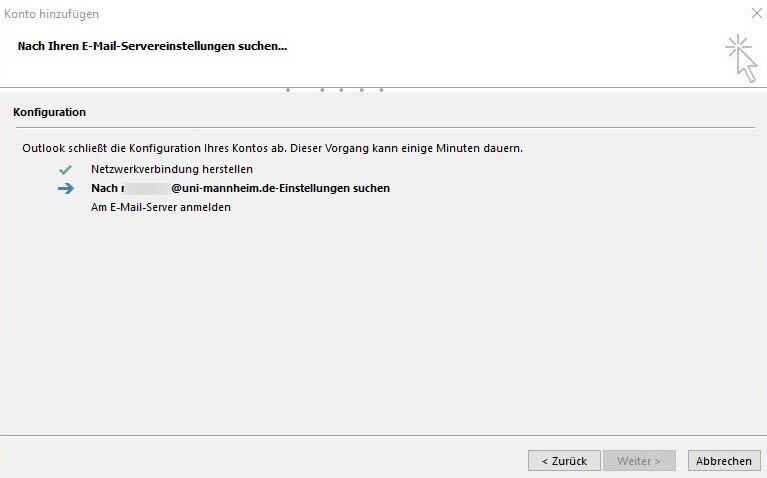
4. Outlook will then try to connect to your new mailbox:
5. You may be requested to allow the page exchange.uni-mannheim.de to make changes to the settings of your account. Please confirm this request:
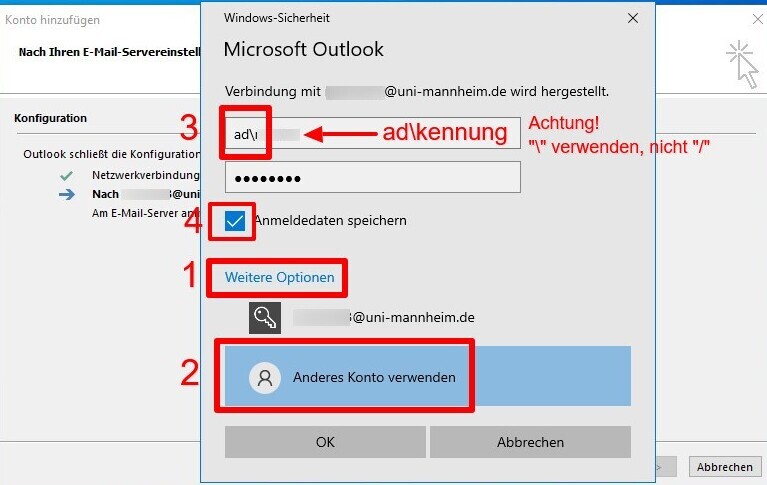
6. Please proceed as follows in the login window that appears next:
- Open “Advanced settings” -> “Use other account”.
- Then enter your Uni-ID (= previously “user ID”), preceded by “ad\“ and your password. Important: Please make sure to use “\“ and not ”/“.
- Check the box “Save login information” and continue by clicking “Ok”:
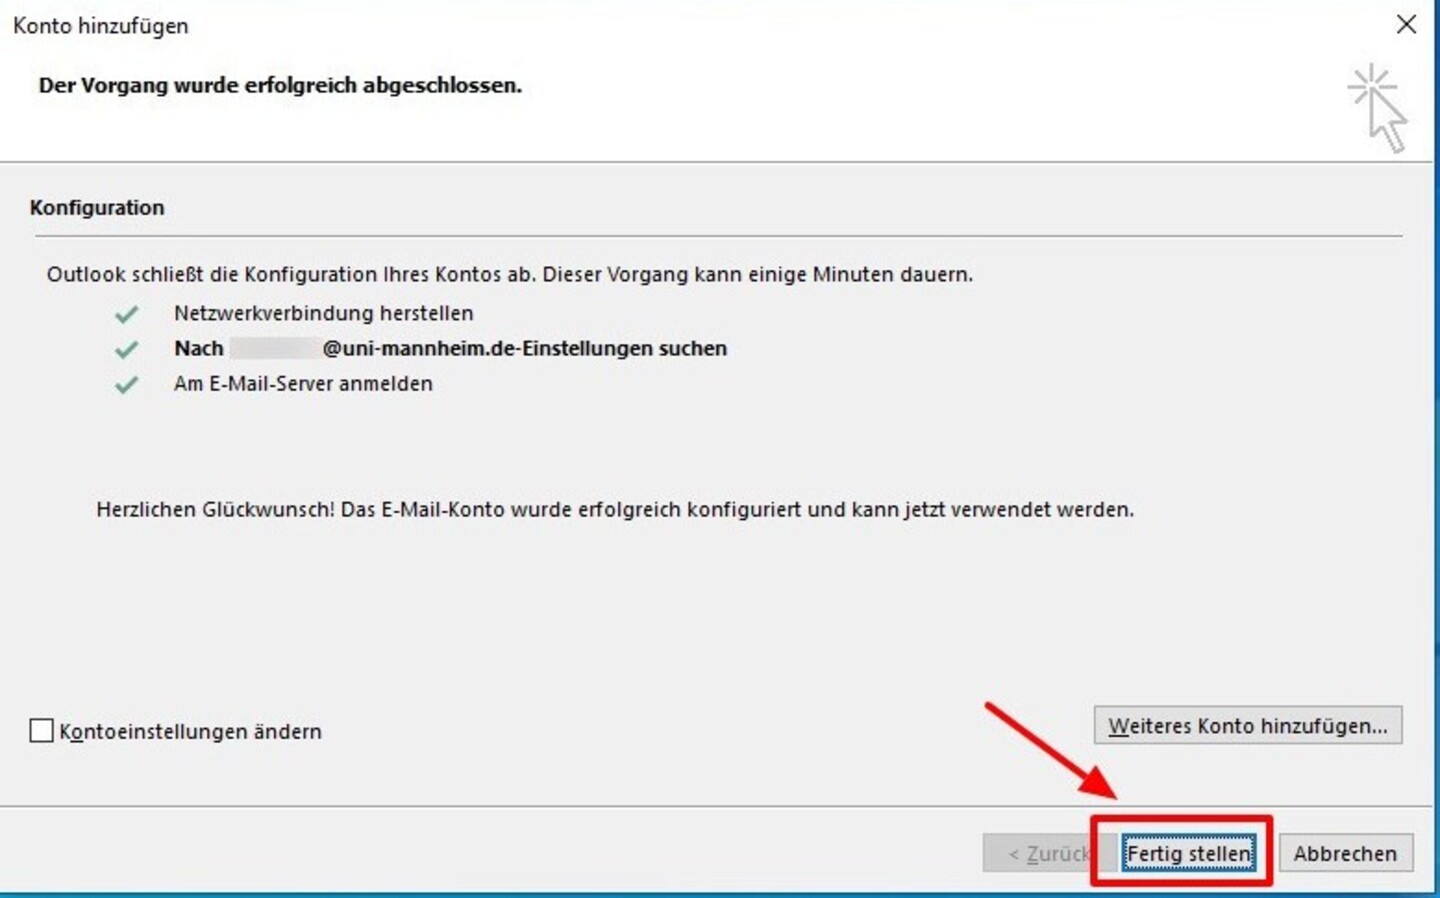
7. Outlook will then connect to your new mailbox. Click on “Complete” to open Outlook:
Adding your e-mail account to Thunderbird
Please note: We cannot ensure the permanent synchronizing of Thunderbird and your calendar and contacts. In this case, the University IT is unable to provide support. We expressly recommend the Outlook clients for Windows/
Adding your Exchange e-mail account to Thunderbird
1. Open your Internet browser (e.g. Firefox or Chrome) and go to https://exchange.uni-mannheim.de.
2. Enter your Uni-ID and the corresponding password and click on the “Login” button:
3. After the login, click on the profile picture in the upper right corner. Your e-mail sending address will be displayed in the pop-up window that opens:
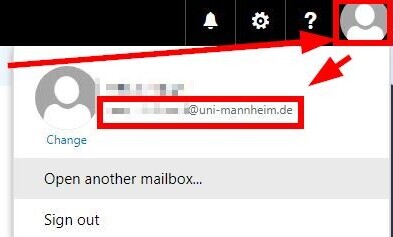
4. Please write this address down -> This is your Exchange sending e-mail address which you will need for the connection.
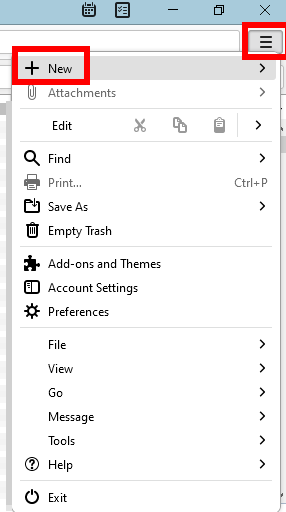
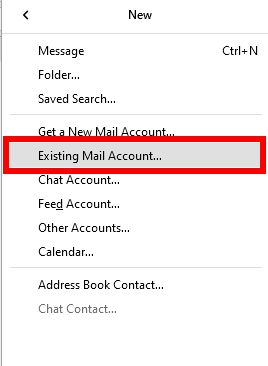
5. Start Thunderbird and click on the application menu in the upper right corner and then on the option “New”. Then select the entry “Existing e-mail account....”:
6. In the window that appears next, please enter your name, your new Exchange senders address and the password of your Uni-ID (=formerly “user ID”). Then click on the button indicating that you choose the manual setup:
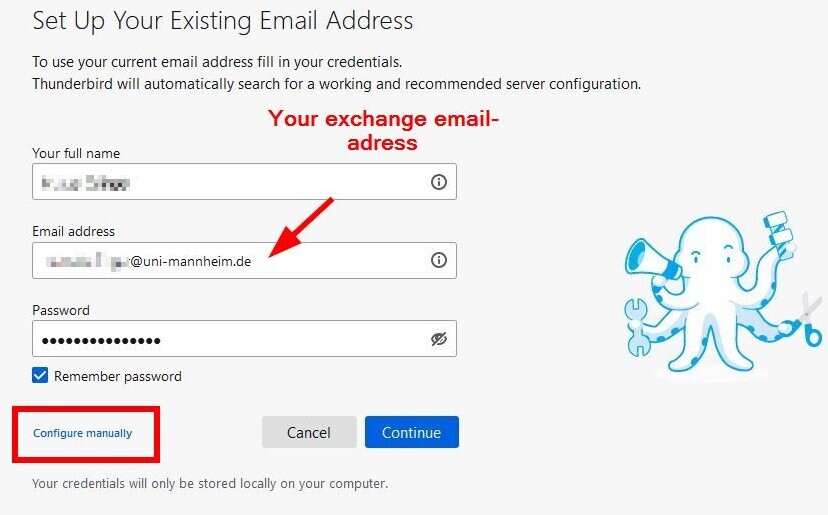
*See steps 1–4.
7. Please enter the following values in the windows that open and then click on the “Finish” button:

Incoming mail server:Protocol IMAP Server exchange.uni-mannheim.de
Port 993 SSL SSL/ TLS Authentication Password, normal User name Uni-ID
Outgoing mail server:
Server exchange.uni-mannheim.de
Port 587 SSL STARTTLS Authentication Password, normal User name Uni-ID
Thunderbird will then connect to your new mailbox and synchronize your e-mails.
Updating the system folders in Thunderbird
We recommend setting up the system folders in your e-mail client in such a way that they are identical to the folders of the Microsoft Exchange OWA (Outlook web access). This way, the same folders will be used in the e-mail client and OWA.Please proceed as follows to update the system folders:
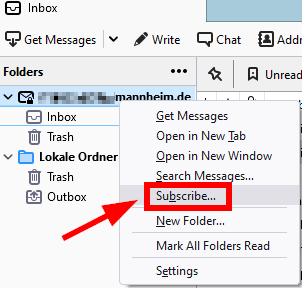
1. Please make sure that all Exchange folders are displayed. Click with the right mouse button on the e-mail account and select “Subscribe...”:
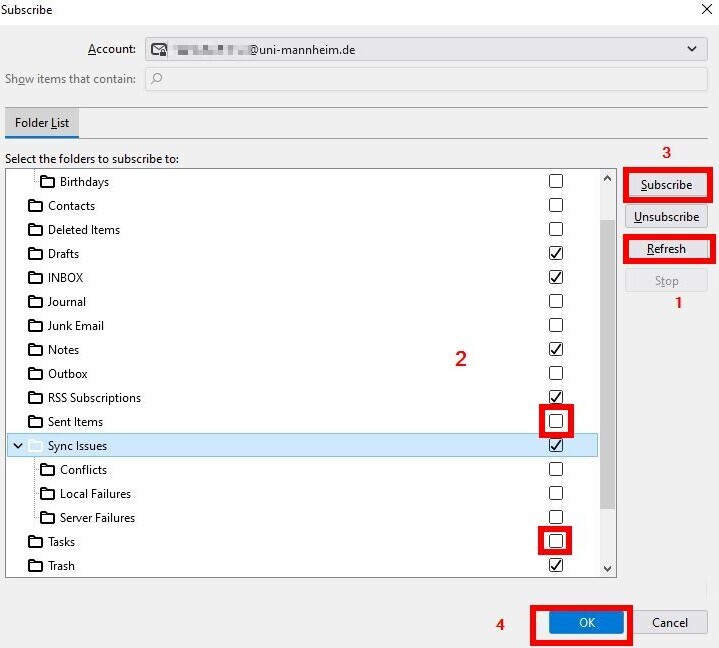
2. Click “Update” (1) in order to receive the latest Exchange folder list. Then check the boxes of the folders that should be displayed in Thunderbird (2). Then click “Subscribe” (3) and then “OK” (4). Now the new folders will be displayed in Thunderbird:
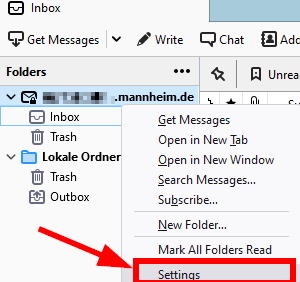
3. Click with the right mouse button on your e-mail account and select “Settings”:
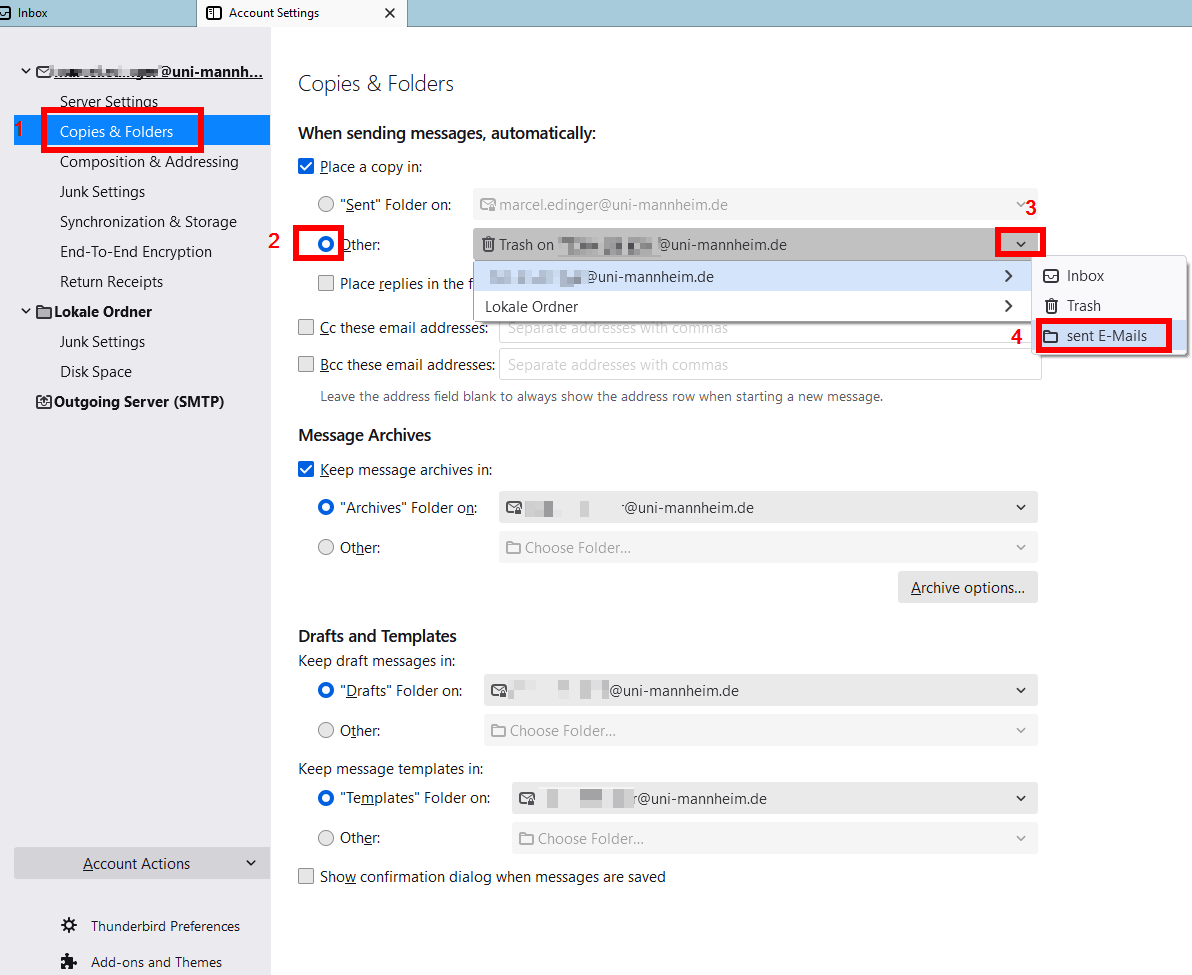
4. In our example, we describe how the folder for sent e-mails is updated. In the menu on the left, click “Copies & folders” (1). In the middle, activate the option “Other folder” (2) under “When sending messages automatically”. Then click on the drop down arrow (3) and select the folder “sent elements” (f) under your e-mail account (NOT “Local folder“)
The system folders should now be displayed correctly, at the latest after you closed and re-started Thunderbird.
In order to also synchronize your calendar and your contacts, please follow the instructions in the next chapter.
Connect the calendar and contacts of your new Exchange mailbox to Thunderbird

The permanent functionality of these calendar and contacts add-ons depends on the developers of the individual add-ons. If these add-ons are not updated, you may not be able to use them with your Exchange mailbox. In this case, UNIT cannot offer support. Therefore, we expressly recommend the Outlook clients for Windows/
Mac or Outlook web client for using your Exchange account.
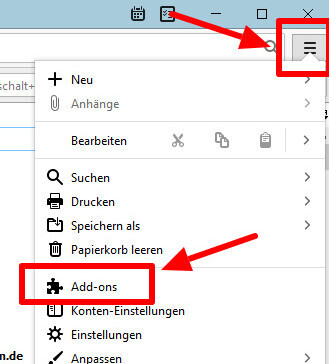
In order to synchronize not only your e-mails but also the calendar and contacts of your new Exchange mailbox in Thunderbird, you need to install and set up two add-ons:1. Click on the application menu in the upper right corner in Thunderbird and choose the “add-ons” option:
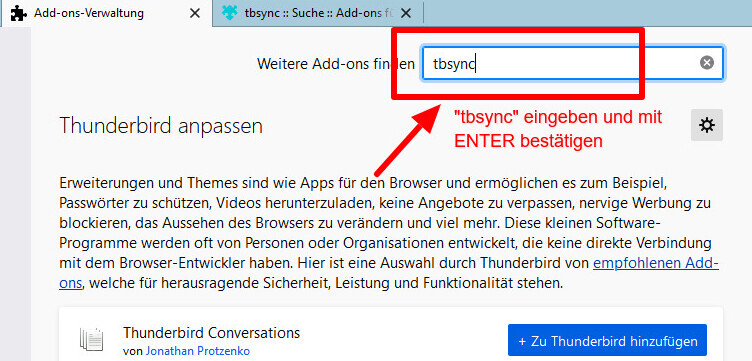
2. In the window that appears, enter “tbysync” in the search bar at the top and confirm by clicking the “Enter” key:
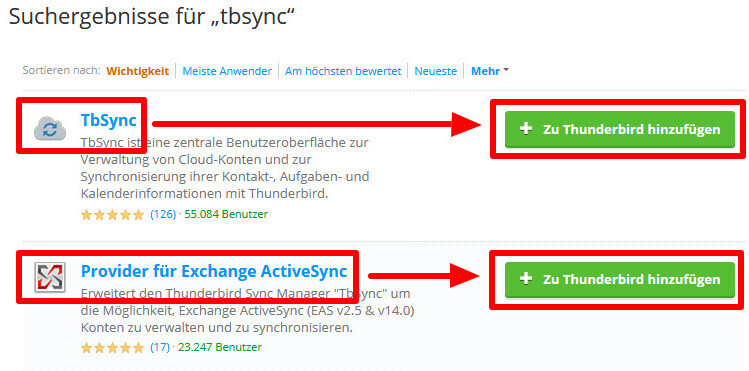
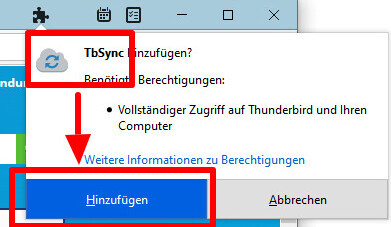
3. A tab with search results will appear. First, click on the button “Add to Thunderbird” in the section for the “TbSync” add-on, confirm and repeat the process for the add-on “Provider for Exchange ActiveSync”:

4. Close the two add-on tabs and switch back to the main window of Thunderbird:

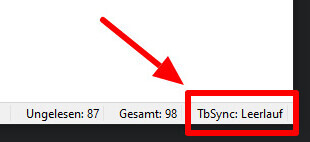
5. In the lower right corner, click on “TbSync: Leerlauf”:
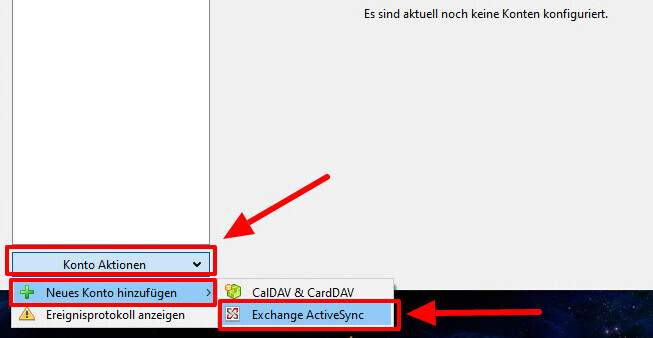
6. This will open the TbSync account management. Then go to the lower left corner and choose “Account actions” -> “Add new account” -> “Exchange-ActiveSync”:
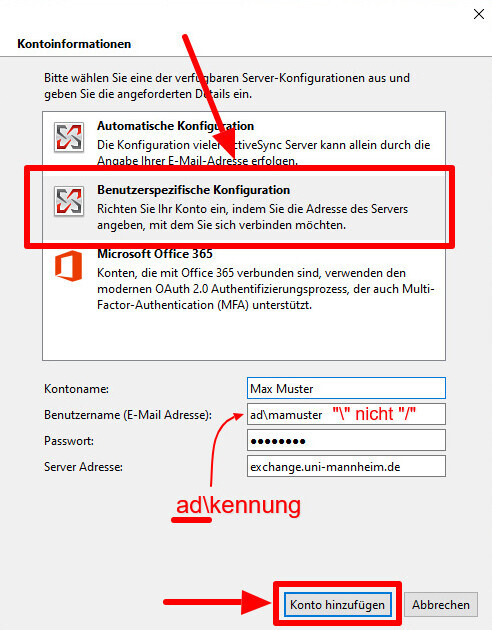
7. Then select “User-specific configuration” and enter your data. In the field “User name (e-mail address)” enter your ad\Uni-ID, for example ad\mamuster. Then click on the “Add account” button:
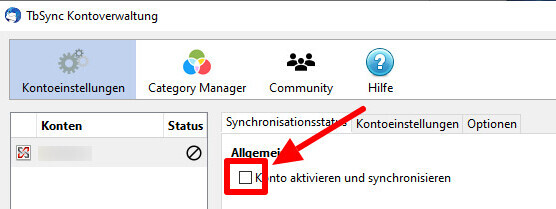
8. The account will then be added and must be activated. Check the box “Activate and synchronize account”:
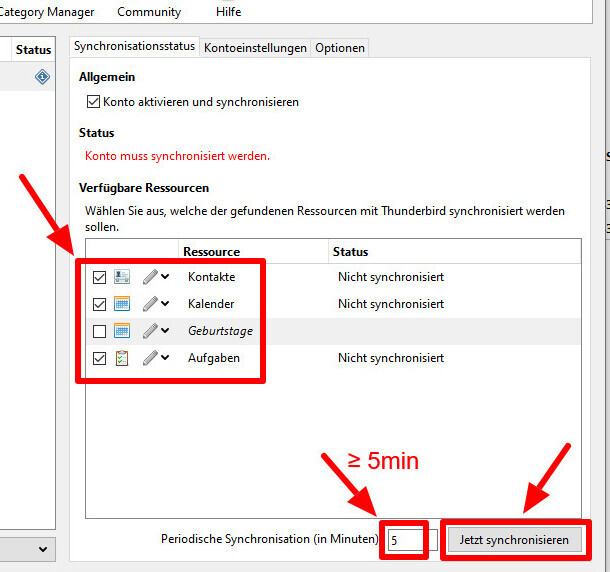
9. Then a selection menu will open in which you can choose the contents to be synchronized. For your calendar and your contacts, check the boxes “Contacts” and “Calendar”. Then set the periodical synchronization (≥ 5min) and click on the “Synchronize now” button:
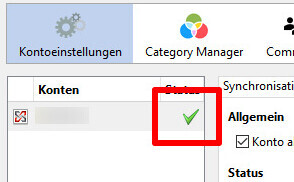
10. Then the elements you selected will be synchronized. If a green tick appears next to your account name, the synchronization has been successful.
Now you can access your calendar and contacts.
If you want to search for contacts in the university’s global address books, switch to the address book in Thunderbird, mark your new Exchange account by clicking on it and then search for your contacts in the search bar in the upper right corner:

Information and error messages
Please note that Thunderbird’s functions will be restricted when connected via the IMAP protocol with your new Exchange mailbox. For example, when you create and synchronize your e-mail folders, they will not automatically have the same structure as in your Exchange mailbox. You need to go to the settings to adjust the folder mapping. In this case, UNIT is unable to provide support. In Outlook 365, Outlook 2019, Outlook 2016 and the web client, this will appear automatically.
Error messages when synchronizing
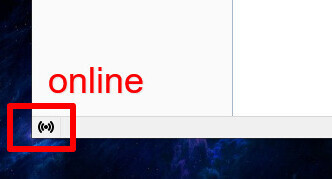
If you see error messages when synchronizing:
- Make sure that Thunderbird is in online mode. If this is not the case, click the button in the lower left corner:

- If this does not solve your issue, please check your account settings again, by un-checking the box “Activate and synchronize your account” and then switch to the tab “Account settings”.