Installing Office 365 on a macOS Device
Please note that Office 365 is only supported on the latest version of macOS or one of the two previous versions.
Important information for users of Office Professional Plus 2017/
If a version of Office Professional Plus 2016/
Step 1: Go to https://portal.office.com and login with your Uni-ID as follows:
User name: Uni-IDad.uni-mannheim.de
(Example: mmuster@ad.uni-mannheim.de)
Password: The password for your Uni-ID.
Answer the question if you want to continue to be logged in with yes.
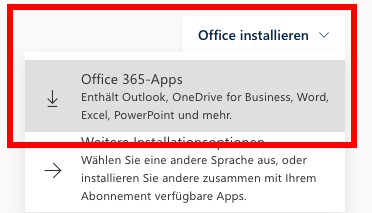
Step 2: Go to the upper right corner of the screen and download the setup file for Office 365.
Step 3: Save the file to your Mac, before you execute it.
Step 4: Install Office 365 and follow the instructions of the setup program.
Step 5: After the installation has been completed, please download the Microsoft Office License Removal Tool for Mac.
Step 6: Install the tool and execute it. Please confirm that you want to remove the existing license for Microsoft Office.
Step 7: Wait until now to start one of the newly installed Office 365 applications, e.g. Microsoft Word. A request to login will appear. Please use your user name Uni-IDad.uni-mannheim.de and the corresponding password for verification, as described in Step 1.
Your installation of Office 365 on this end device will now be registered with Microsoft and the corresponding license will be installed. Now you can use Office 365.
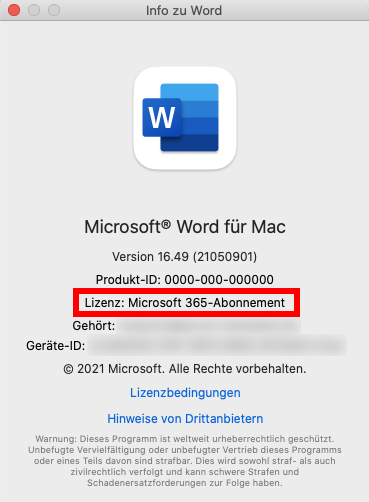
Step 8: To check if everything works the way it should, click Word – Info Microsoft Word. The following information must be visible: