Energy Saving at the Workplace
On this website, you will find a few tips on how to save energy at the workplace.
Adjust the settings to that your computer goes automatically into sleep mode (but not into stand-by mode) and disconnect the device from the power source after you have finished your work for the day (if possible).
Do not use a screen saver and let your screen turn off automatically.
Reduce document printing to the bare minimum and turn on the printer only when necessary.
Adjust the screen brightness to 60–80 percent.
Most devices have built-in keys in the feature bar of the keyboard that are marked with a symbol (sun for brighter, moon for darker).
Please lock your computer if you leave your desk during office hours. After a short period of time, the monitor will also turn off. Windows keyboard shortcut: “Windows key” + “L” and shortcut for macOS: “command“ + “control“ + “Q“
Turn on the energy-saving mode of your printers (via printer settings) and monitors. The settings vary, depending on the manufacturer. Please check the manual of the device or the website of the manufacturer.
If you need to discuss something, it is better to meet in person and not choose a video conference call, if the person is near you.
If you have a notebook with an illuminated keyboard, adjust the settings to that the lights are turned off automatically.
Other tips....
- If you buy something, pay attention to energy efficiency and sustainability labels such as TCO Certified, EnergyStar or the Blue Angel.
- Use switchable/
automatic power extension strips to be able to turn off your computer and all devices connected to it after you finished your work for the day. - Use a central printer instead of several printers at individual desks.
- Use notebooks with docking stations instead of desktop computers. Mobile end devices are more energy-efficient but also more expensive. It is advisable to use one end device for remote work and work on campus.
- If mobility is not the most important factor for you, it is advisable to use mini computers instead of desktop computers. They are smaller, more budget-friendly and consume less energy. However, mini computers do not have the highest performance level. They are only suitable for standard office applications.
Instructions
Put computer automatically into sleep mode and have screens turned off automatically
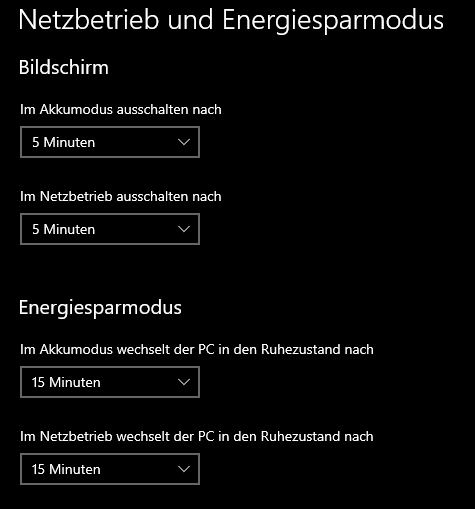
Windows 10:
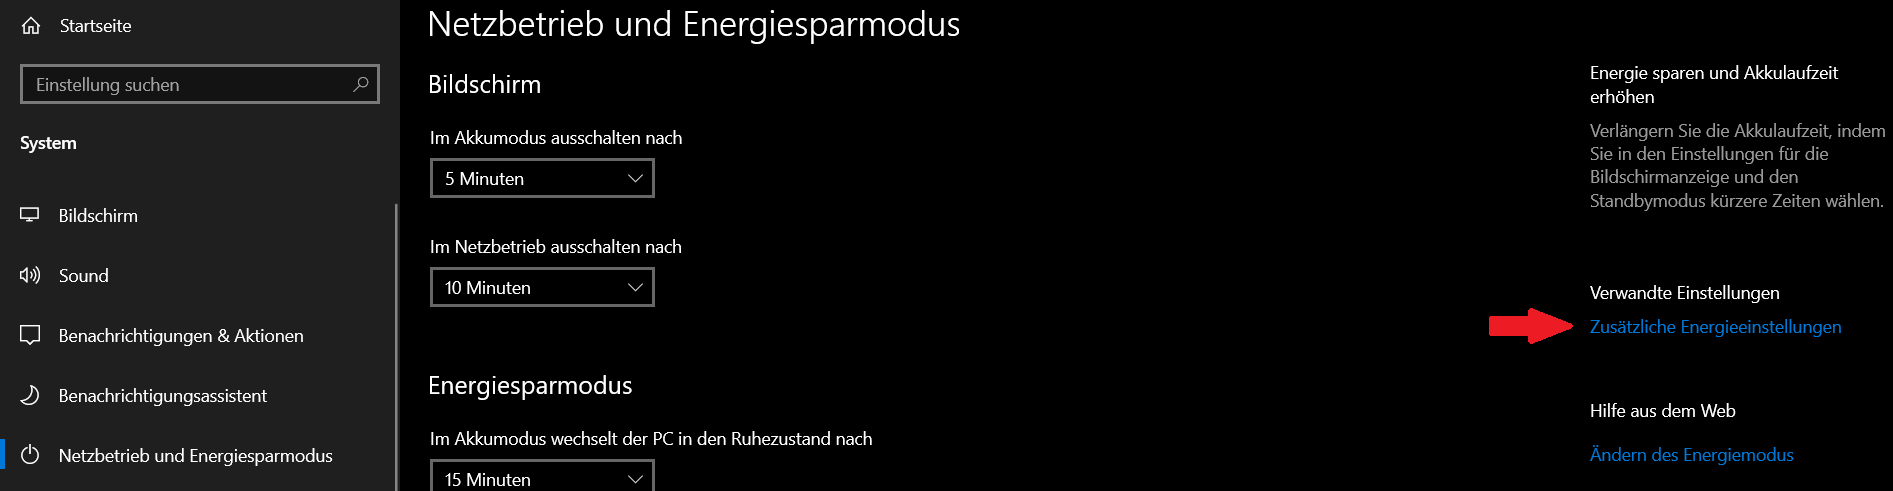
- Click on the window symbol of the start tab and open the settings.
- Choose “System”.
- Click on “Plug in and energy saving mode”.
- Now you can select the times after which the screen will be turned off or the computer returns to sleep mode.
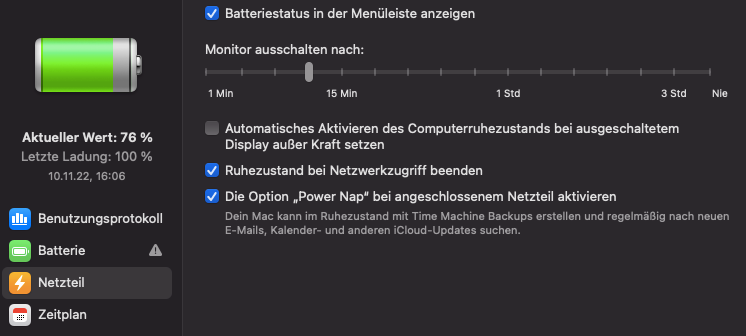
MacOS 12 Monterey and older:
- Click on the Apply symbol in the upper left corner.
- Then click on “System settings...”.
- Then click on the “Battery” icon.
- In the “Power adapter” and “Battery” tabs you can select the time after which the monitor is turned off (as soon as the monitor is turned off, the computer is also put in sleep mode).
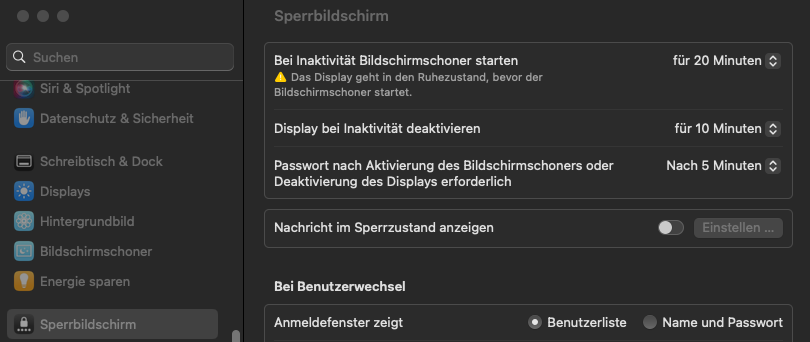
MacOS 13 Ventura:
- Click on the Apple symbol in the upper left corner.
- Then click on “System settings...”.
- Click on “screen saver”.
- Here you can adjust the times at which the screen saver is activated and the display is turned off. The time for the screen saver must be higher than the time set for “turn off display if inactive” so that the screen saver never becomes active.
Adjust the settings to that the lights of illuminated notebooks are turned off automatically
Windows 10:
There is no standard answer. With Windows, this depends on the manufacturer of the keyboard / laptop.MacOS 12 Monterey and older:
- Click on the Apple symbol in the upper left corner.
- Afterwards, click on “System settings...“.
- Click on the keyboard icon.
- You can now click on the marked box and set the waiting time.

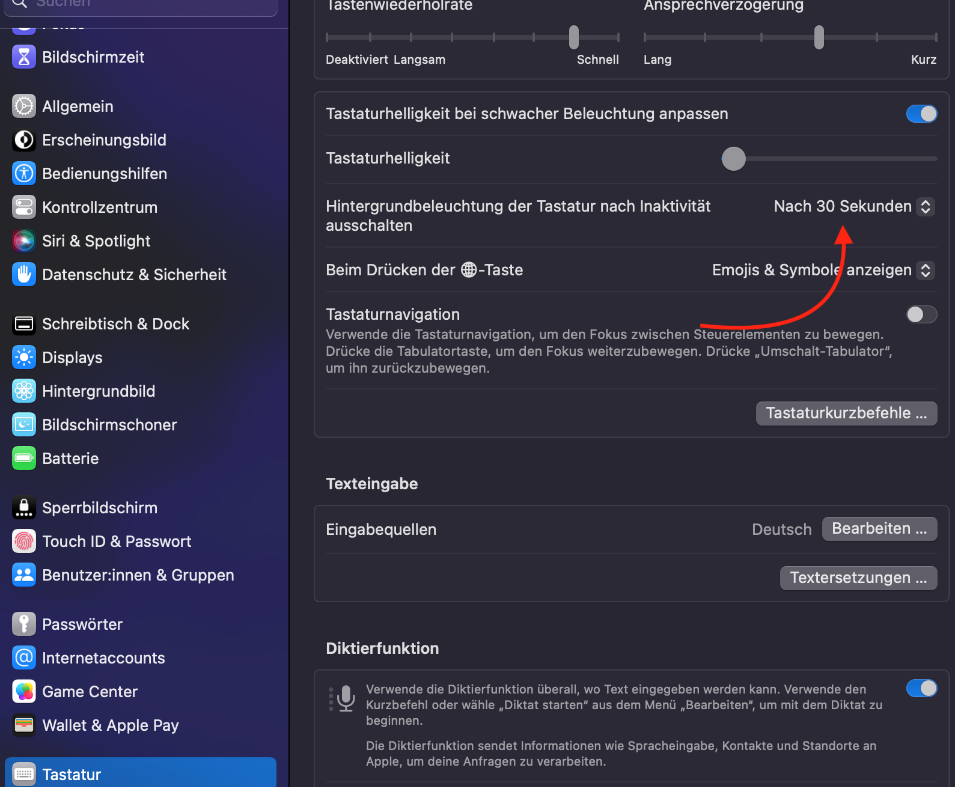
MacOS 13 Ventura (with built-in keyboards):
- Click on the Apple icon in the upper left corner.
- Then click on “System settings...”.
- Click on keyboard.
- Here you can adjust the time after which the illuminated background is turned off.
Adjust the screen brightness
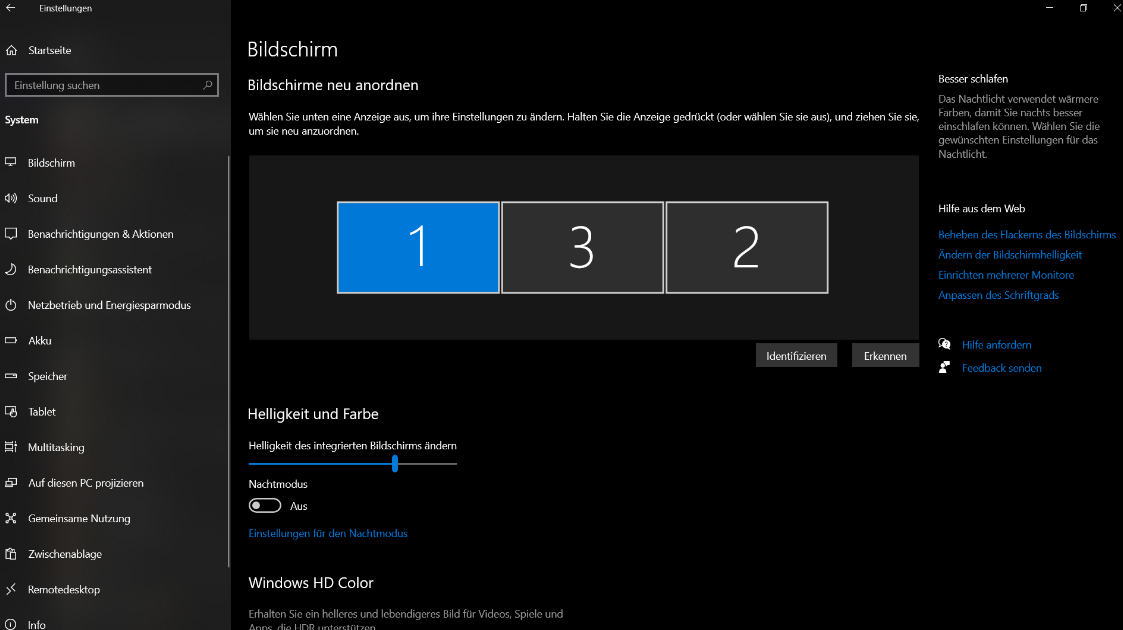
Windows 10 (with integrated screens, e.g. notebooks):
- Click on the window symbol of the start tab and open the settings.
- Choose “System”.
- In the “Screen” tab, you can adjust the brightness of the integrated screen.
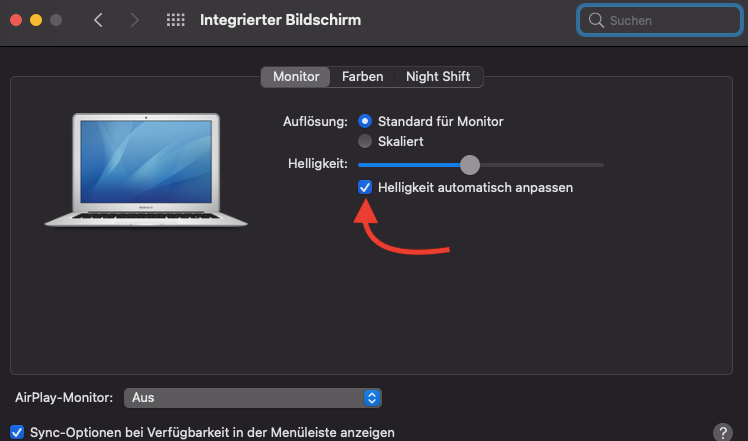
MacOS 12 Monterey or older (with integrated screens, e.g. MacBook)
- Click on the Apple symbol in the upper left corner.
- Afterwards, click on “System settings...“.
- Then click on the “Monitor” icon.
- Here you can adjust the brightness of the integrated monitor. By checking the box (see screenshot), the brightness of your MacBook/
iMac) will be adjusted automatically to the lighting conditions.
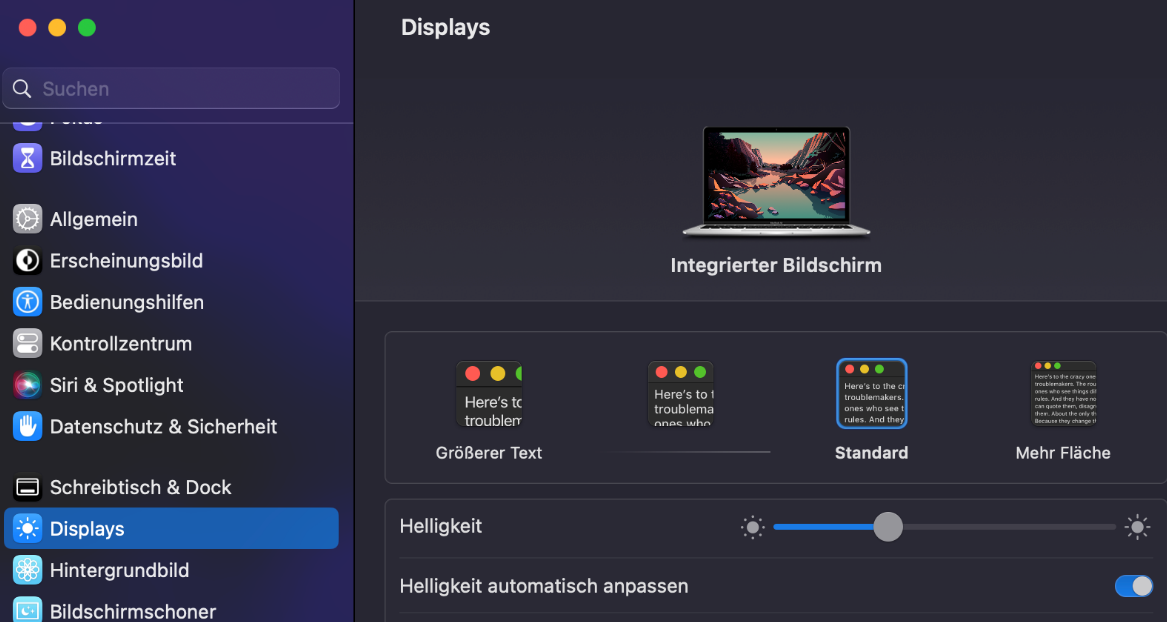
MacOS 13 Ventura:
- Click on the Apple icon in the upper left corner.
- Then click on “System settings...”.
- Then click on “Displays”.
- Now you can adjust the display brightness.
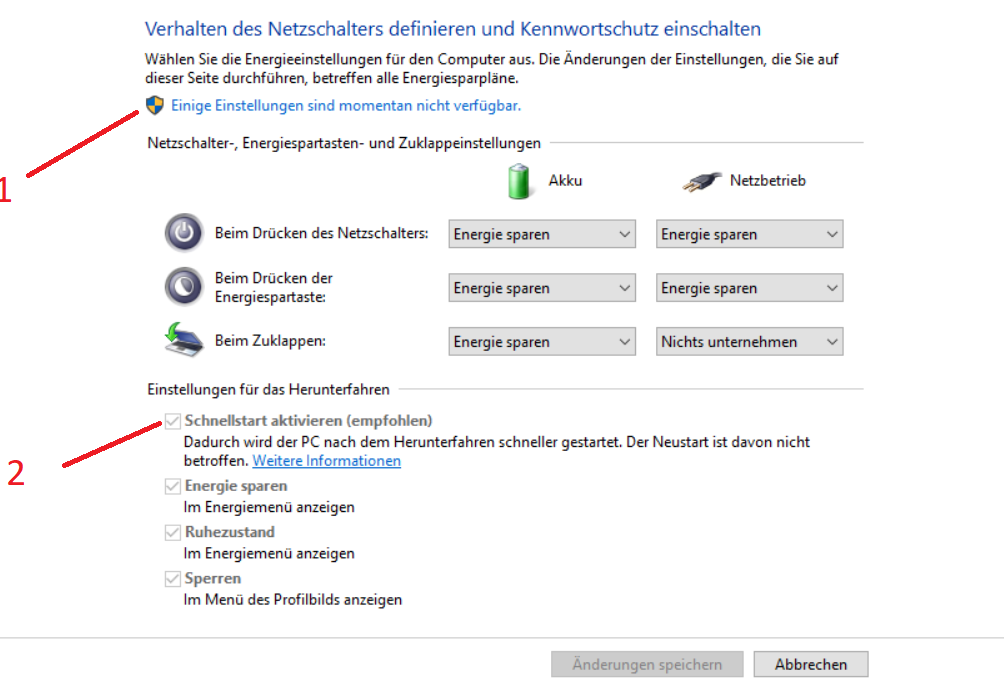
Disable fast boot for Windows
- Click on the window symbol of the start tab and open the settings.
- Select “System”.
- Click on “Plug in and energy saving mode”.
- On the right side, click on “More energy settings”.
5. Then click on “Select what happens when you press power adapters”.
6. Click on 1 and authorize administrator’s rights. Then press 2 to disable the fast boot option.