Mailbox Rules for Alias Addresses
You can skip these instructions if you do not have mailbox rules or do not use mailbox rules that only apply to individual alias addresses.
Due to technical changes of Microsoft Exchange, there have been some changes with regard to how inbox rules for individual e-mail addresses (“aliasses”) work after the switch to Proxmox Mail Gateway.
Only the rules that trigger when an e-mail to a specific address of your account is received, are affected.
General rules that trigger for all incoming e-mails will work like before and you do not have to make any changes.
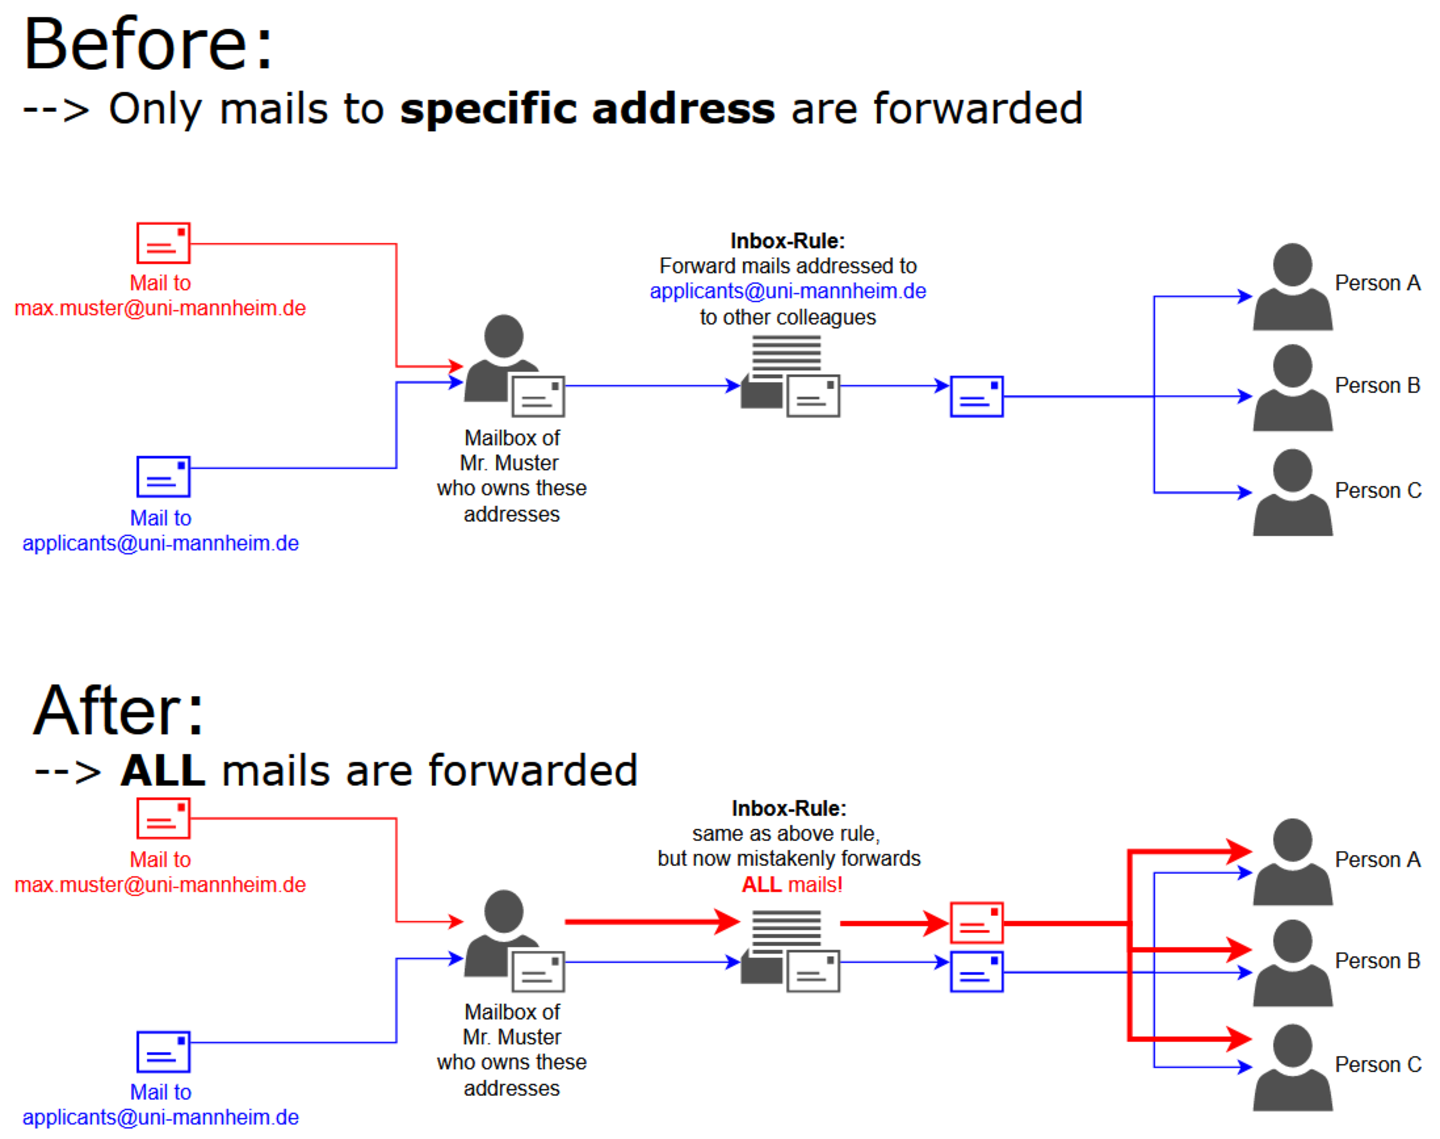
In the following image, you see the effect of such a forwarding rule before and after the changes:
If you have created such an inbox rule, please choose one of the following alternatives:
Alternative 1 (our recommendation!): For forwarding rules ask the IT support to transfer the mail address to a new or an already existing shared e-mail account (Funktionspostfach). This has the benefit that the e-mails are not forwarded to your mailbox first but go directly to the shared e-mail account and do not have to be forwarded at all. The shared e-mail account can then be used by several persons which makes it easier to collaborate.
Alternative 2: For forwarding rules where e-mails are only forwarded to an individual person, you can ask the IT support to transfer the e-mail address to the mailbox of this person. This way, e-mails are not forwarded to your mailbox first but go directly to the person for whom they are intended. It is no longer necessary to forward these e-mails.
Alternative 3: Adjust the existing rule as shown below. Please note that with this solution, the rule will trigger for all e-mails which are sent to or mention the relevant address in the envelope (= recipient, CC, subject line). This means all e-mails with the relevant address in the subject line will trigger the rule.
Step 1:
Open the Outlook Web App (OWA).
Step 2:
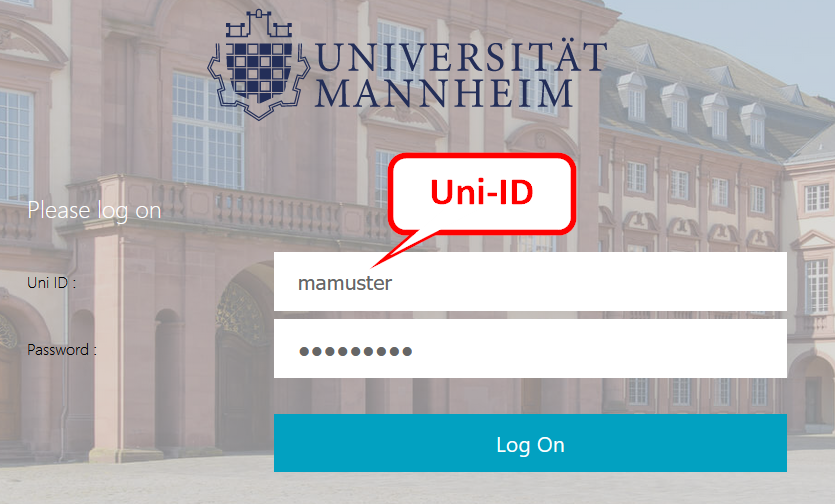
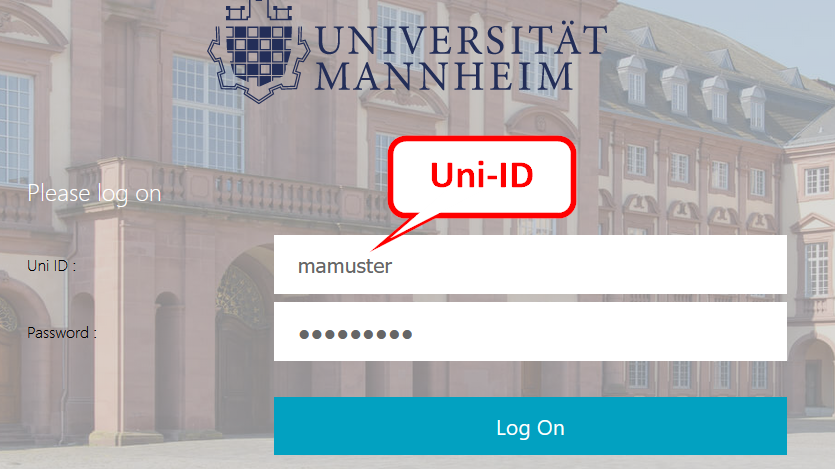
Enter your Uni-ID in the “user name” field and the password for your Uni-ID in the password field. Then click “Login”:
Step 3:
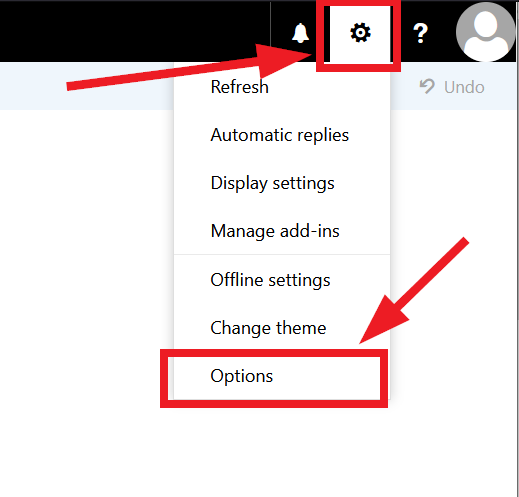
You will then get to your e-mail inbox. Click on the gear symbol in the upper right corner to access the settings and then the “Options” button:
Step 4:
Click on “Inbox and sweep rules” and then on the “+” symbol in the menu which opens:
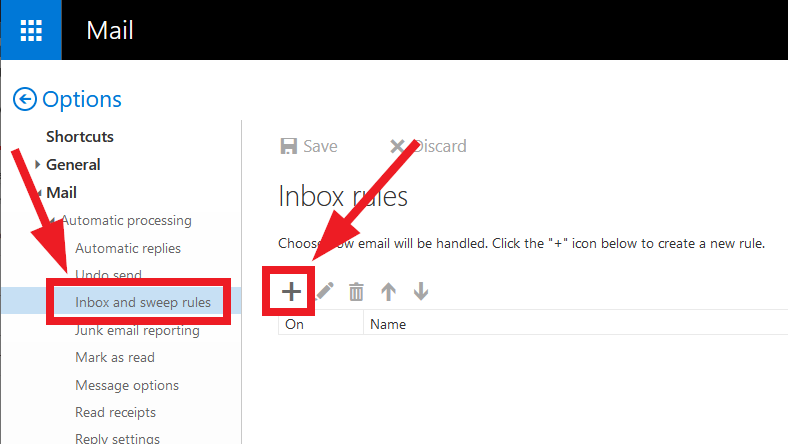
Step 5:
Enter a name for the rule and then click on the drop down menu under “When the message arrives”, and then on “It includes these words” and then on “In the message header...”:
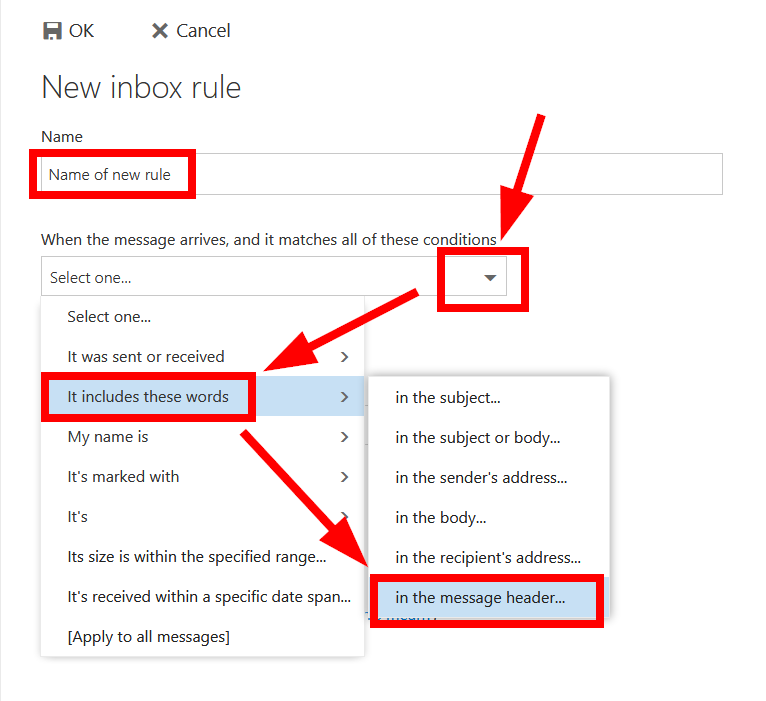
Step 6:
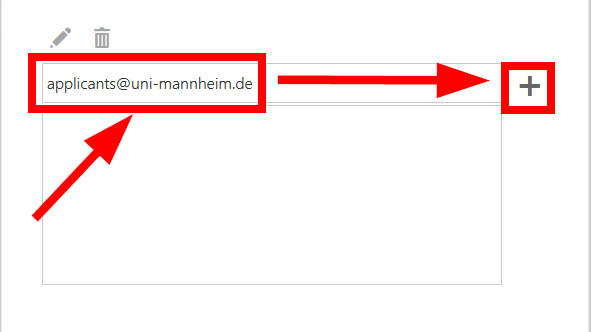
Enter the relevant e-mail address in the upper field (here the example address from the diagram above), click on the “+” symbol and then on the “OK” button.
Be advised regarding partial-matches: For example, if the entered address is“unituni-mannheim.de” and this mailbox also has an address "sekretariat.unituni-mannheim.de", then the rule will also trigger for this longer address, because it partially contains “unituni-mannheim.de”. Consider alternatives 1 and 2 in these cases or drop this address from the rule.
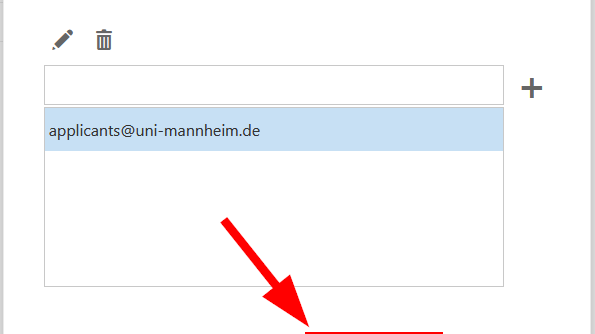
Step 7:
Choose the selected action for e-mails that are sent to this address. In most cases, this is the forwarding or rerouting of e-mails. You can then proceed with step 6 of the following instructions: https://www.uni-mannheim.de/it/anleitungen/microsoft-exchange/weiterleitung-einrichten/