
Zoom
Zoom is a software for virtual meetings and can be used by all staff members of the University of Mannheim. Virtual rooms make it possible for staff members to hold interactive lectures or digital meetings with external guests and/


The University of Mannheim provides staff members with a personal Zoom account. You have access to your personal Zoom account by logging into Zoom (desktop application or webbrowser) with your Uni-ID.
With the assigned license, you can host meetings with up to 300 participants. Just like the Zoom rooms for virtual lectures, the settings have already been configured by the University IT.
How do I use Zoom?
You can generally use Zoom in your web browser. However, the features are limited here. Zoom is responsible for the data traffic on its website. If you use Zoom in your web browser, the connection is not encrypted.
If you install the desktop application, you can use all features. We recommend the installation if you want to host a meeting.
On the Zoom website, you will find more information on the differences between the versions: https://support.zoom.us/hc/en-us/articles/360027397692-Desktop-client-and-mobile-app-comparison
Our IT Support is happy to help you installing Zoom on devices provided by the university.
Download
Tip
For security reasons, a current client version is required to use Zoom. The Zoom client is updated automatically every three months. To close critical security gaps, an update may also be issued outside of this schedule in exceptional cases. Since a restart is required after each update, we recommend that you open the Zoom client a few minutes before an upcoming video conference in case you need to restart it.
Who gets a personal Zoom license and how do you sign in?
Personal Zoom licenses are only available for (academic and non-academic) staff members of the University of Mannheim. Research assistants and students do not receive personal Zoom licenses.
Please note: A personal Zoom license is not required to participate in virtual events. Participation is possible without restrictions and disadvantages.
Where can I find the course link?
You will find the information required to participate in the meeting in the course details section on Portal²: On the details page of the relevant course, you can click on “show meeting links” (or alternatively “showing single dates”) in the “parallelgroup/appointments” tab.
You will then receive an overview of all individual dates and appointment series for the course as an overlay. Once you have agreed to the Terms of Use, you will see the Zoom links. Please note that the host Zoom link does not appear until 60 minutes before the meeting.
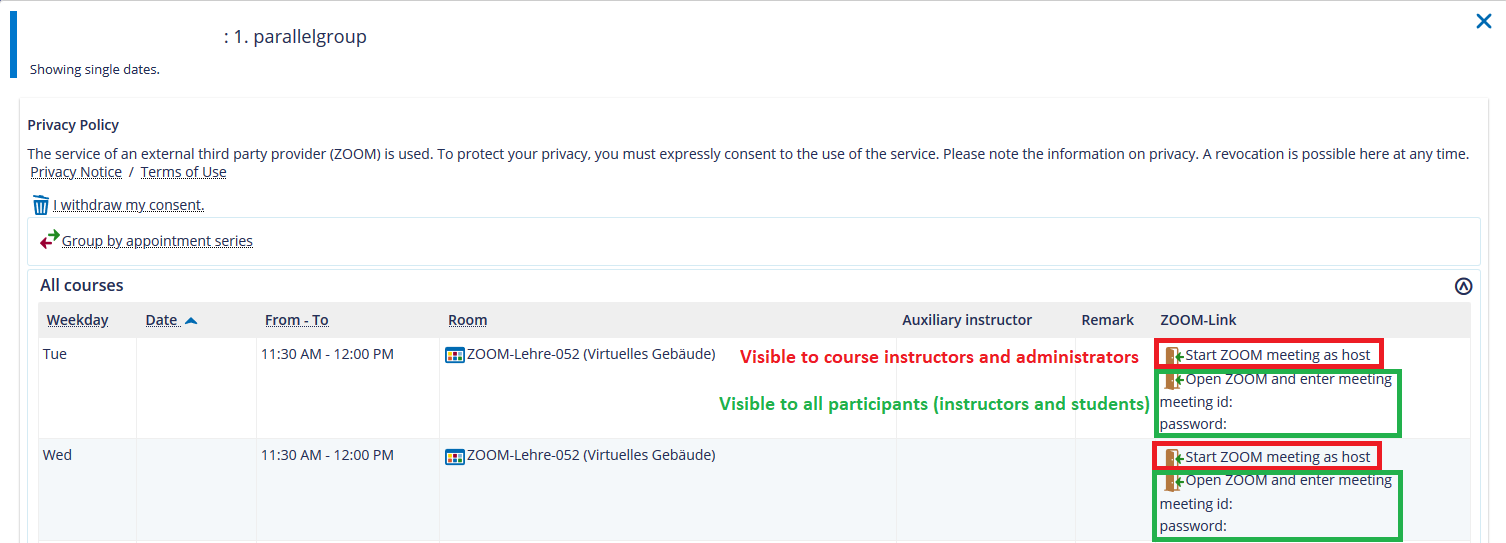
The registration for hosting is possible either by entering the host key (you can find it via ILIAS → Digitalisierung in der Lehre) or by using the meeting link for hosts via Portal2.
How can I book a Zoom room?
Virtual courses
Please note: Zoom links only appear if the corresponding participation option is selected.
To book an course-specific Zoom meeting:
- Open the edit view of the course.
- Click on “Appointments & Rooms”.
- Click on the calendar-with-arrow symbol in the corresponding row.
Why are no course links displayed?
If you cannot access the course links via portal2 , please check the following settings.
1. Agree to the Terms of Use
The course links will not be displayed until you agree to the Terms of use (Data Protection Policy).
Select the “I agree to the use” box in the “Show individual events” tab in Portal2 under “Data Protection Policy”.
2. Check the participation options
To view the links, you must choose one of the following options:
- Live and on-campus & digitally live (not recorded)
- Digitally live (not recorded)
- Digitally live & recorded
- On-campus & digitally live – recorded
To do this, the basic data of the course must be changed in portal2: Detail view → Other features → Edit course → Edit basic data of the parallel group → Participation option
The change takes effect immediately and applies to all future classes. The Zoom links are displayed immediately and work. Once the setting is undone, all Zoom links are removed immediately.
3. Room features
In addition to checking the correct participation option, it must also be ensured that the room provides the correct features for the links to be displayed.
Use Portal 2 to make sure that “Zoom” is listed in the room details under “Equipment” in the lecture hall you have selected.
You can also conduct an in-person course with a Zoom meeting in a room without the appropriate lecture hall equipment (i.e. with your own laptop). To do this, you must first book the actual room in Portal² as usual. To book and display the Zoom meeting, another series of appointments must be created in the course: To do this, create a second parallelgroup with identical appointments and select “Create Zoom meeting”.
What do I need to keep in mind when inviting others to join a meeting?
- Members of the University of Mannheim should access Zoom meetings via Portal². If you access the link via Portal² or the host shares the link specified in Portal² with you, you do not need to enter a Zoom password. However, you need to agree to the terms of use.
- Participants, who are not members of the university, need the zoom.us link (and the corresponding password) or must be invited to enter the virtual room during the meeting. The link is made up of uni-mannheim.zoom.us/j/ and a 10-digit combination. This information is specific for each room and can be found in the room details in Portal².
Please disclose the information required to participate in the meeting only to the participants. Publishing the information on the website or on social media is not permitted.
When distributing the link, please make sure that the invited persons have access to the Terms of Use. Joining the meeting constitutes acceptance of the terms of use. Please use this link to distribute the Terms of Use: https://www.uni-mannheim.de/en/it/terms-of-use/zoom-requirements/.
Please note: If required, the Zoom link can also be included as a web link on ILIAS or shared via the ILIAS mailing feature.
- Please disclose information on the course only to the participants and do not publish the data on the Internet.
- Non-members of the university who join the meeting have to have access to the terms of use.
Please inform the participants about their rights when you invite them or when you start the meeting, at the latest.
Generally, the participants have the following rights:
The participant may...
- join a meeting without registration or without having their own account
- use a pseudonym
- refuse to activate the camera or microphone
- use a digital background for video transmission
- leave the meeting before recording starts (see Recording Zoom meetings)
The participation in courses is an exception with regard to pseudonymized names and the transfer of video and sound: Performance evaluation based on active and assignable participation is a basic requirement in some cases. This is why using the real name and the transmission of video and sound can be a requirement.
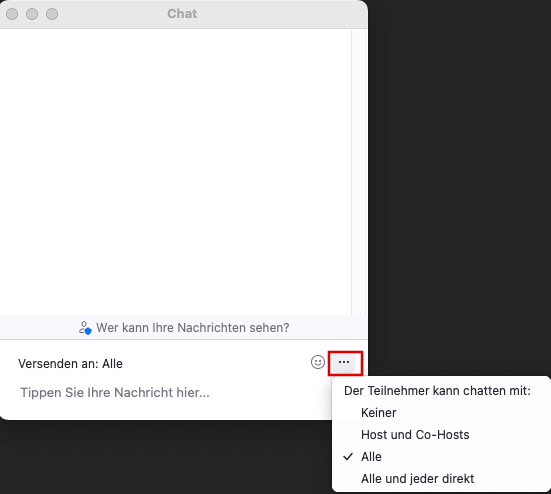
Seit November 2022 ist bei Lehrveranstaltungen, die über Portal² gebucht werden, der Chat in Zoom-Räumen standardmäßig eingeschränkt: Das bedeutet, dass Nachrichten im Chat allen Teilnehmenden angezeigt werden und Direktnachrichten zwischen einzelnen Teilnehmenden nicht zugelassen sind.
Als Host können Sie diese Einstellung jederzeit anpassen, sofern es für die Lehrveranstaltung notwendig ist. Öffnen Sie dazu das Chatfenster und klicken Sie auf die drei Punkte („Der Teilnehmer kann chatten mit:“), um die Standard-Einstellung von „Alle“ auf die gewünschte Option zu ändern.
Please note the following information on how to use Zoom:
- Participants only see the chat history from the moment they joined the meeting. They do not see what was written before. The chat history is not saved and will be deleted after the meeting has ended. The text from the chat history cannot be copied. However, this does not prevent others from taking screenshots. Therefore, please be careful about what you write in chat messages.
- It is also possible to join a Zoom meeting by phone.
What are the basic Zoom features?
Basic features
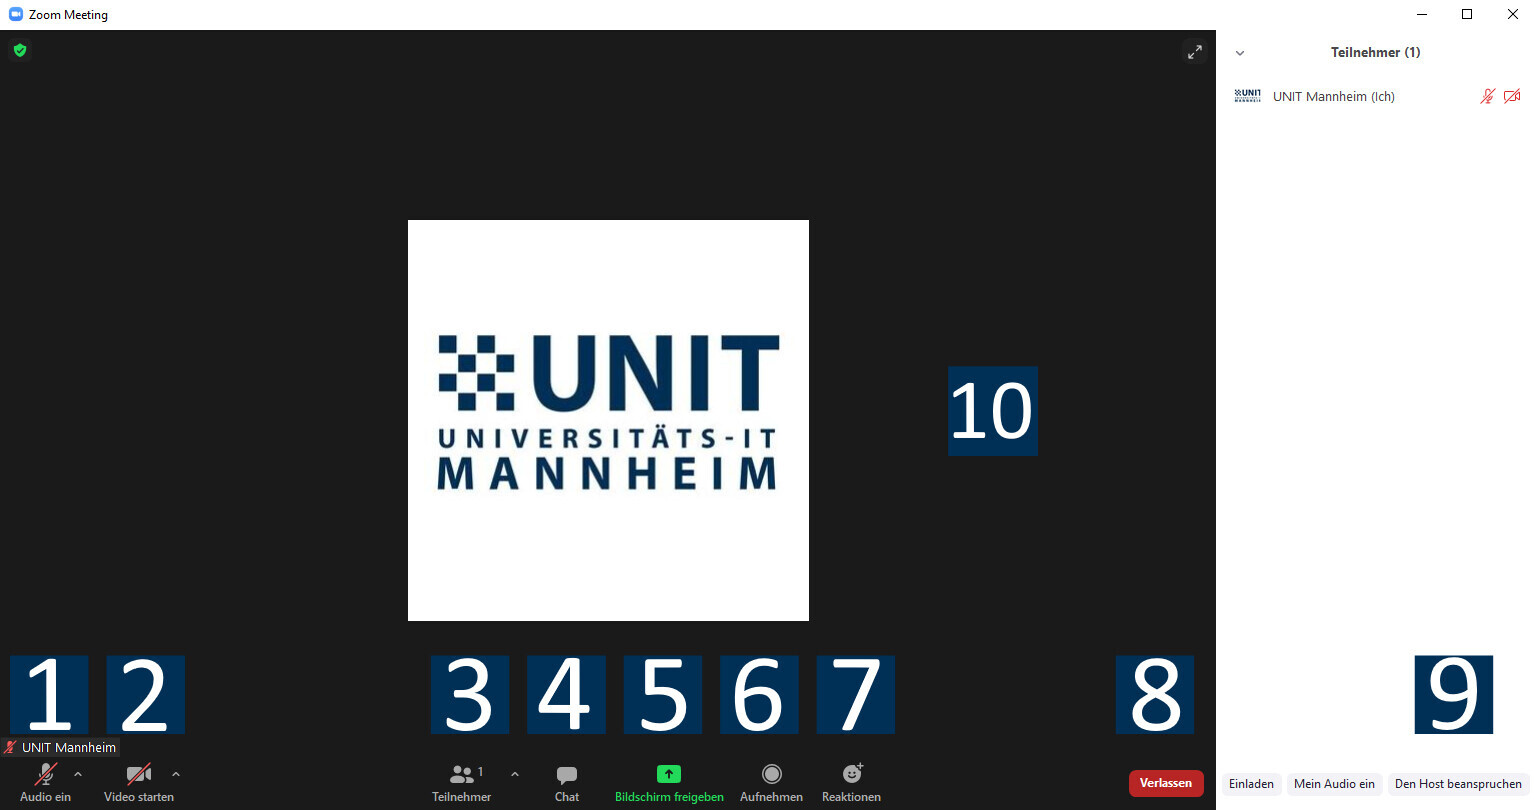
1) Turn microphone on/
off
2) Turn camera on/off
3) Show and manage list of participants
4) Open chat window
5) Start screen sharing
6) Recording a meeting (local)
7) Reactions (non-verbal feedback)
8) Leave meeting
9) Become host of the meeting (host key required)
10) Video areaThe host can use the following features:
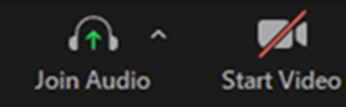
Starting and ending video and sound transmission
Sharing a screen
Various options can be found under “Participants”:
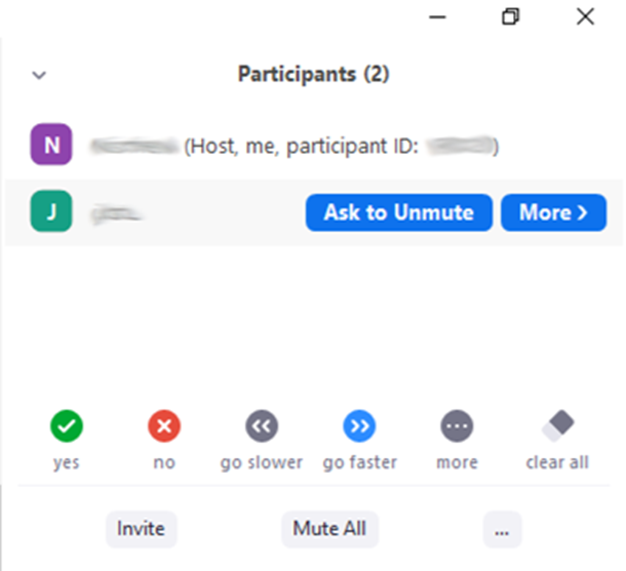
Remove participants from the meeting and/
or assign certain rights Please note: Participants who have been removed cannot re-enter the room on their own. They must first be given access rights by UNIT.
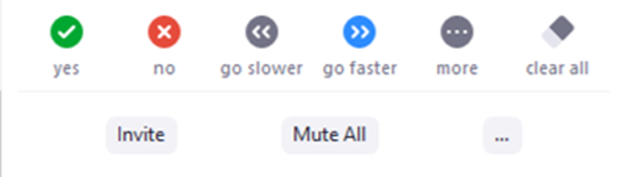
Mute all participants

Further meeting settings are also available


Zusätzlich stehen Ihnen noch weitere Meeting-Einstellungen zur Verfügung
What are the recommendations for conducting meetings?
The following settings have proven to be successful for Zoom meetings:
- Only the person currently presenting unmutes their microphone. This keeps the noise level down. As hosts you can end the video or sound transmission of participants or instruct the participants to end the transmission. You will find instructions under How do I host a virtual meeting?
- If there are problems with the video transmission, only the persons currently speaking should turn off their camera. This reduces network overload which may be a reason for poor audio and video quality.
- If you see any personal items in the video of a participant, please inform the participant in private (e.g. by sending a private chat message).
- If you host a meeting with many participants, we recommend getting additional hosting support and naming a “co-host” to support you during the meeting. This is particularly important for supervising the list of participants and the chat history.
How do I take over as a host?
To host you will need either the host key or the course link for hosts.
Login with host key
- Hosting is possible with a host key. You can find the host key via ILIAS → Digitalisierung in der Lehre.
- It is possible to register for hosting via the link for hosts. The link can be found in Portal² in the details of the course which you can edit yourself (e.g. as a department admin or as a teacher of the event). You can find the host link in the course details (single dates) under “parallelgroup/appointments”.
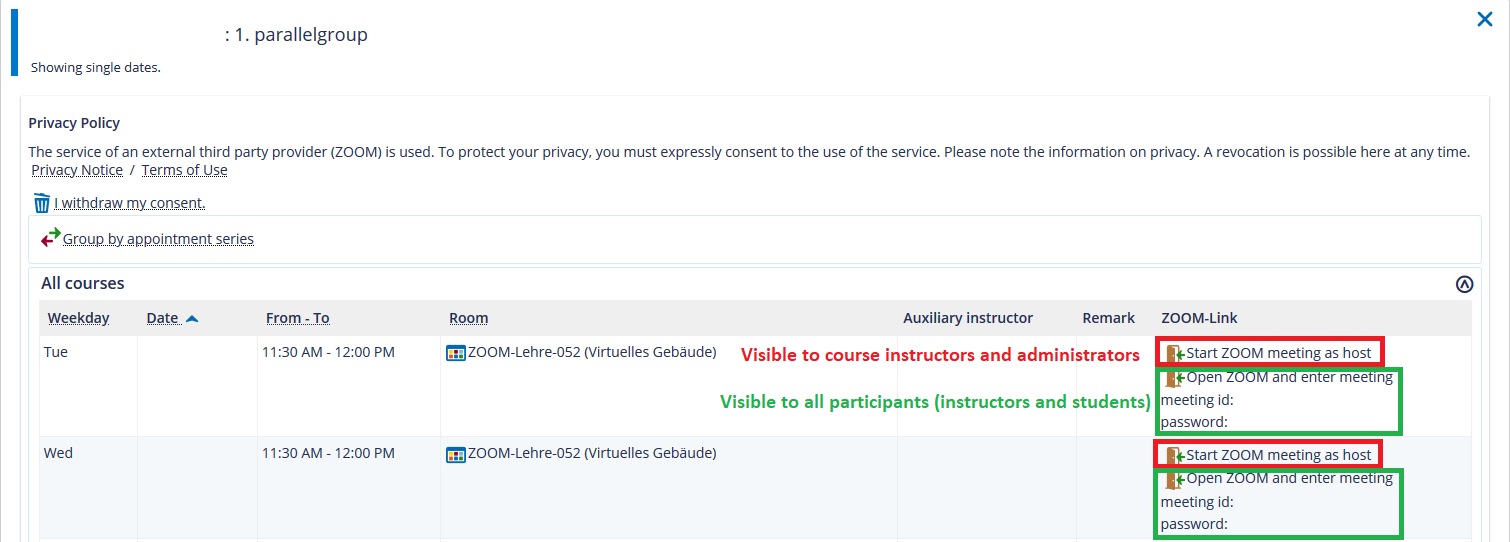
If you have trouble accessing the host meeting link, you can join the meeting using the normal link for participants (“Open Zoom and join meeting”) and claim host rights.
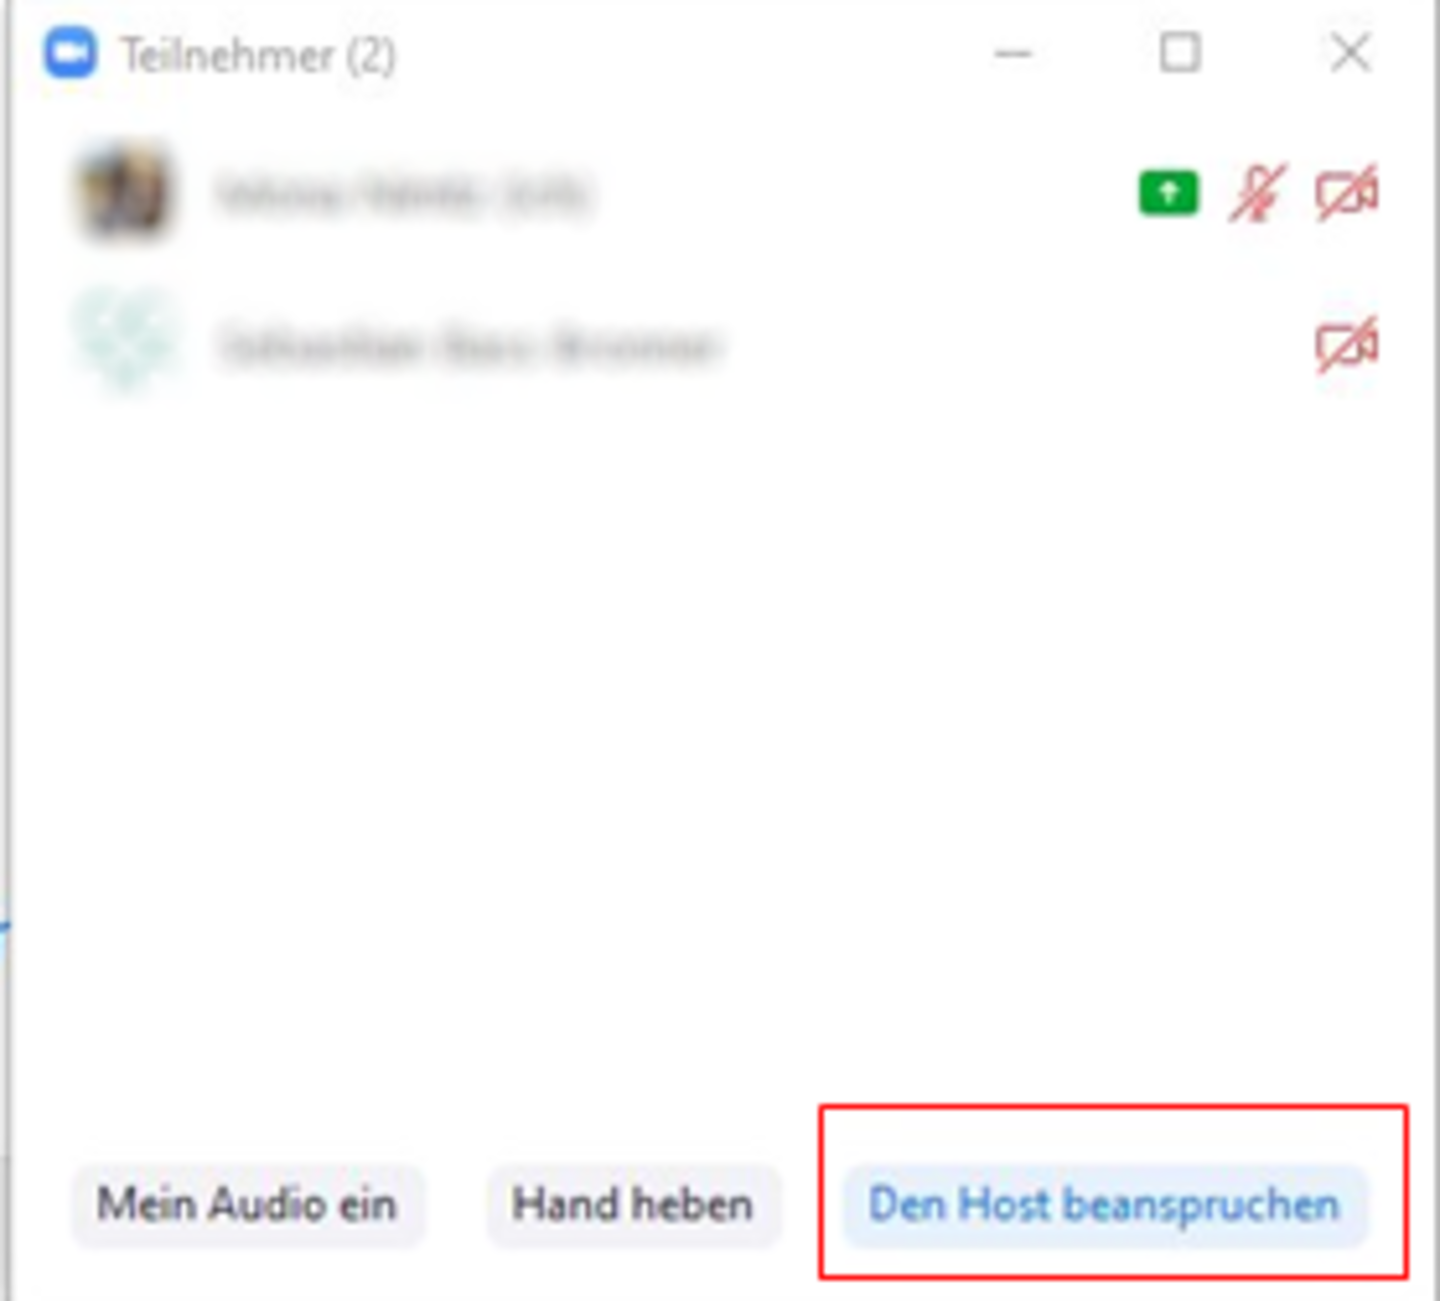
If there is no host yet in the virtual room, you can obtain the hosting rights by entering your host key. This option is called “Claim Host” and can be found in the menu under “Participants” at the bottom right.
If a host is already logged in, only they have the possibility to name additional hosts.
The tasks and options of the host(s) are summarized in the Information on Hosting a Meeting on Zoom.
How do I record a Zoom meeting?
Please observe the requirements specified in the Terms of Use for Zoom as well as the Information on Hosting a Meeting on Zoom. The transcription is currently unavailable because it is part of cloud storage, which had to be disabled for data protection reasons.
Prepare recording
Before you start recording, please inform the participants about the following:- This meeting will be recorded
- participants who do not want to be recorded need to turn off their cameras and mute their microphones
- if participants say something, they will become part of the recording
If participants use the chat feature, please make sure that you do not mention their names, otherwise they become part of the recording without having given their consent.
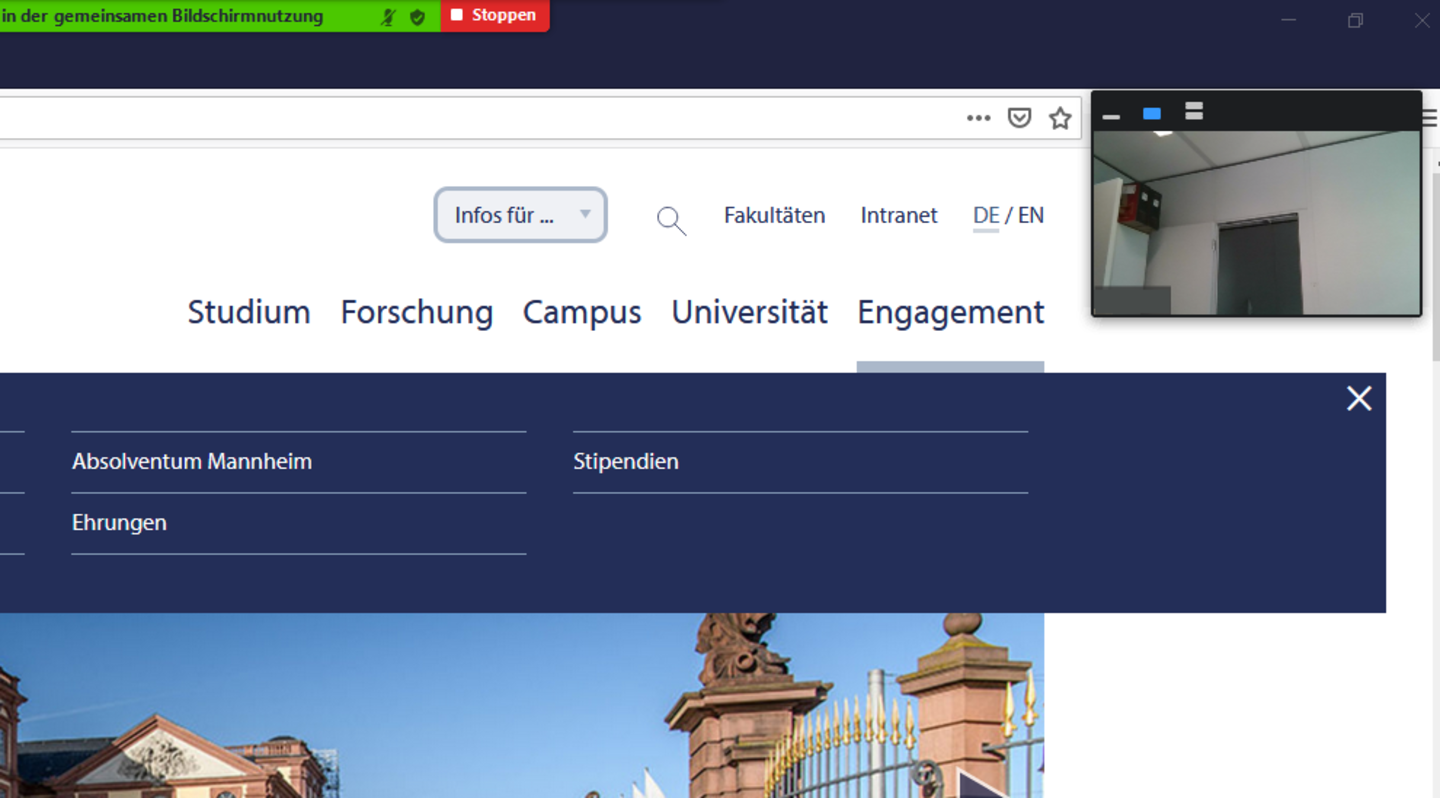
Please use the “share screen” feature to select the application you want to share. Then you adjust the camera view of the participants so that the participants only see the video of the person who is currently speaking.
Recording
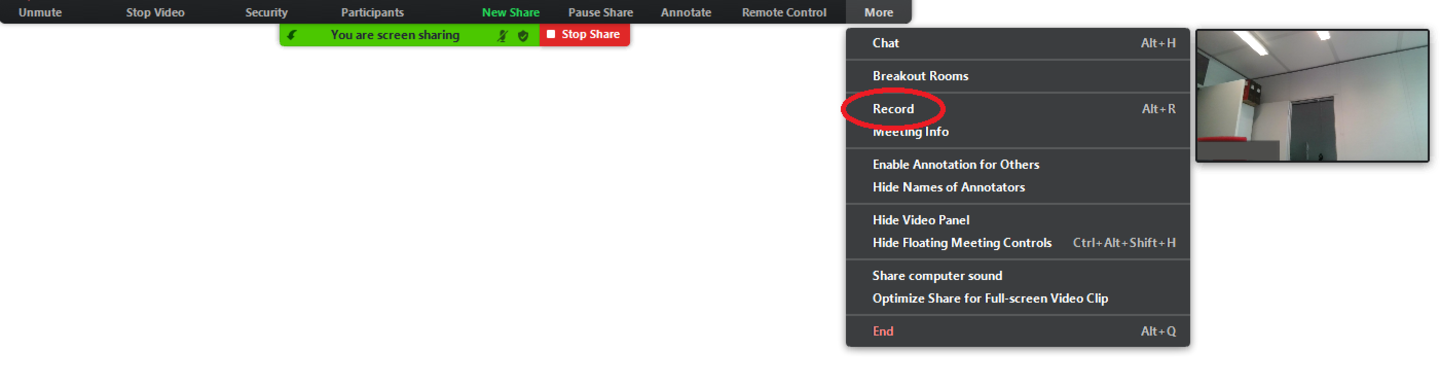
You can start recording in the menu at the top of the screen.- The option “Pause recording” will pause the recording and you can continue recording at a later point in time.
- The option “Stop recording” will end and save the recording.
Stop recording
When you end the Zoom meeting, a dialog box will appear and you can select a storage location. Please note that this may take a while, depending on the length of your recording. You will receive the recorded session as an MP4 file with a resolution of 720p.
Please note: Zoom images taken outside the lecture hall are not automatically uploaded to Opencast. The recordings are only stored locally on the individual end device. Manual recording in Opencast is necessary. For tips on implementation, see the video tutorial.
As described in the Terms of Use, no Zoom session may be recorded without having obtained prior approval by the participants. This is required by copyright and data protection law and the participants have the right to refuse being recorded.
Please observe the following before you announce and start the recording.
- Before you start recording, please inform all participants verbally about the recording.
- When the host starts recording, a pop-up window will appear on the screen of all participants. The text in this window informs participants that they agree to the recording and publishing the recording in ILIAS if they continue to participate in the meeting. In addition, the participants are informed that they can interrupt the recording by disabled their cameras and microphones. If participants do not consent, they may leave the meeting.
- The participants may use a pseudonym and are not obliged to turn on their camera. In ILIAS, you will find templates for a “Netiquette” slide for PowerPoint which you can adjust to your needs.
- Please inform participants who join the meeting at a later point in time verbally about the recording. Nevertheless, these participants will see the pop up window.
- Do not call anyone by their name and do not disclose any personal information while you are recording. However, it is acceptable if f a participant actively interacts with you.
- As an alternative way to contribute to the discussion, the participants should be able to ask questions in the chat. Do not mention any names when you answer.
- Please record in the presenter mode. This way, the chat history and the list of participants cannot be seen on the participants’ screen even if you choose to display the chat history and the list of participants on your screen. Only your video should be visible. Detailed instructions are available in our FAQs.
- If participants turn on their microphone and contribute to the discussion, you may record their contribution. The same applies if students turn on their cameras and can be seen while they talk.
- If students can be seen or heard, the recording may only be used for the current semester and the relevant course. If you want to make a recording which you can also use in future semesters, please make sure that no data of students can be seen. You can also cut the video later on so that the students’ data is no longer visible.
- Inform the participants when you stop recording.
As personal data may be included in recordings of Zoom meetings, these recordings must only be saved and made available on ILIAS.
If you record the meeting, a video file is saved to your local computer. After you have uploaded the file to ILIAS, you must permanently and entirely delete this file.
If you need to save and publish the file outside of ILIAS, you need to document this process and the reasons for it, and present a plan for saving the file. Saving the file outside of ILIAS must be essential to the fulfillment of the hosts’ or the university’s duties. The person responsible for conducting the meeting is also responsible for properly saving the file.
How do I use breakout sessions?
Breakout sessions allow you to split your class into separate groups. You can divide up the course participants either automatically or manually and switch between the sessions at any time. To do so, use the button “Breakout Session” in your meeting toolbar.

Clicking this button will start the division of your class. A window will open in which you can adjust the breakup settings. You also have the option of reassigning the participants to different sessions or to interrupt or terminate the breakup.
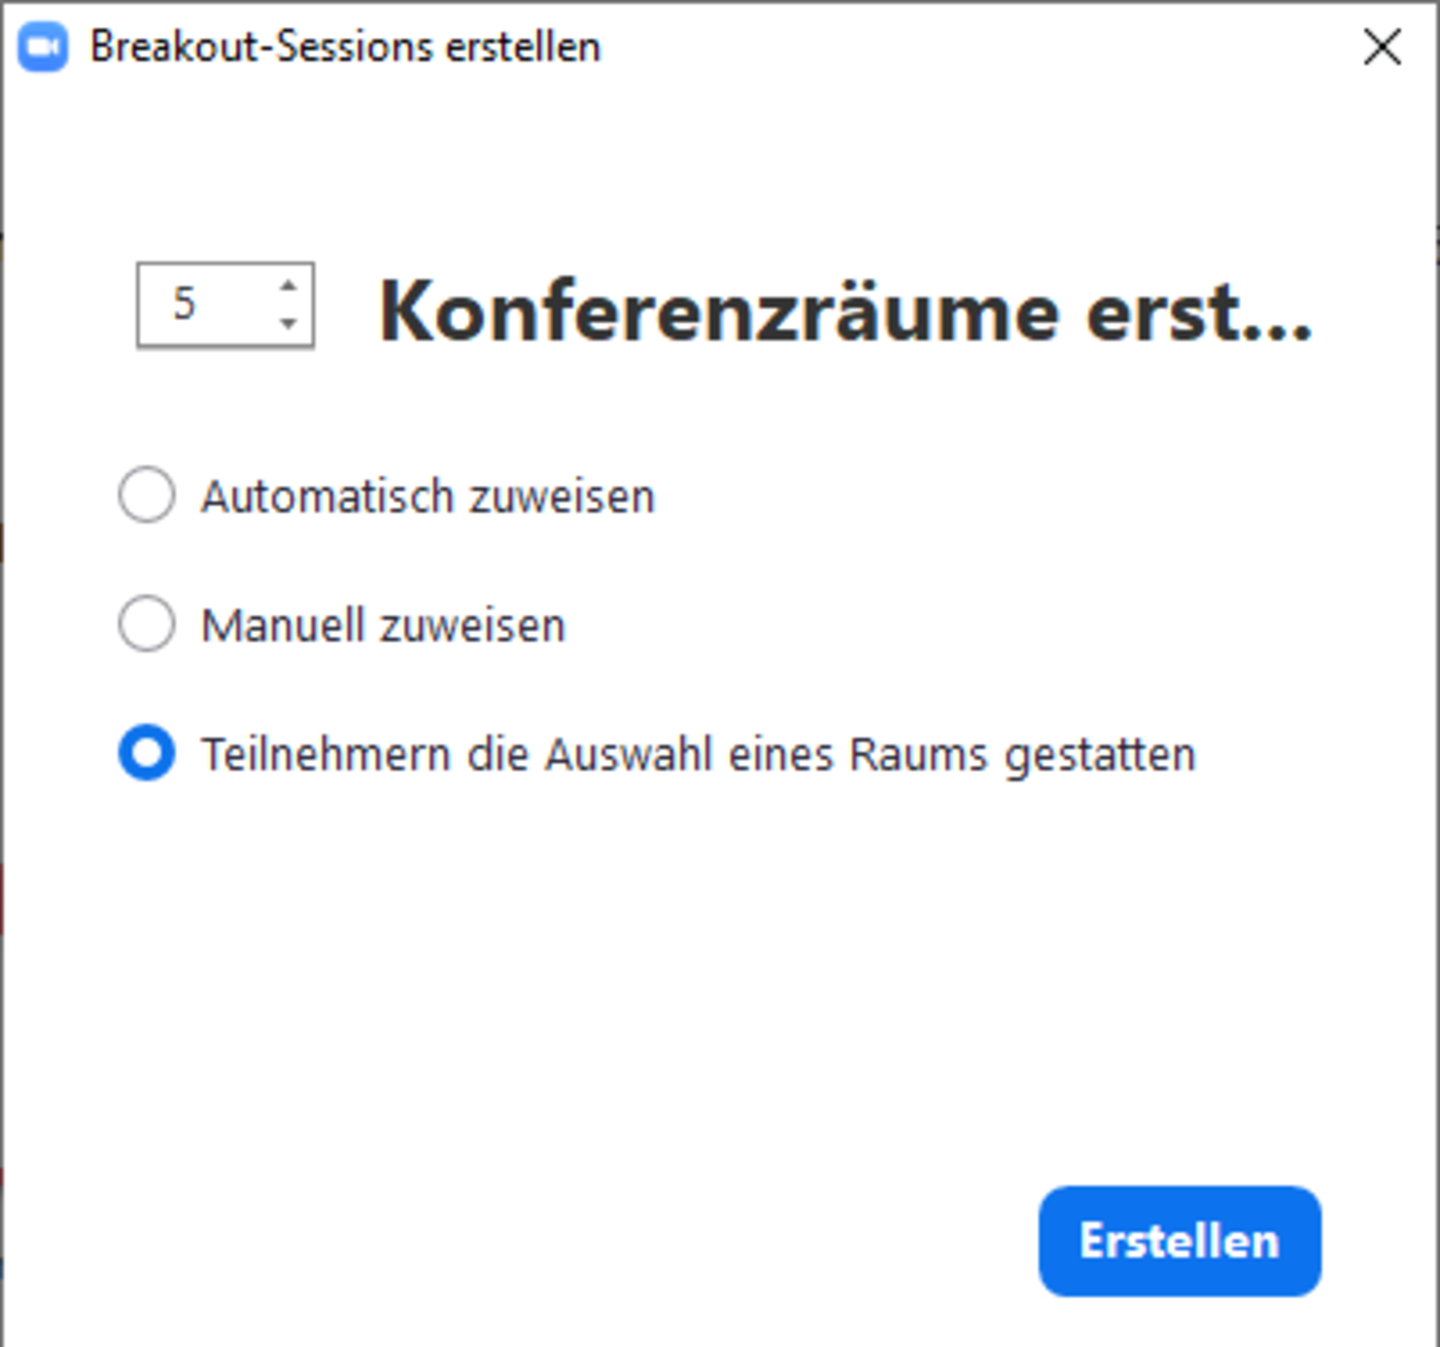
If you want to allow participants to switch between sessions, you need to select the “Allow participants to choose rooms” option when creating sessions.
Which settings are recommended?
For using Zoom as securely as possible while disclosing as little personal data as necessary, we recommend the following settings:
- You should have an individual password for each meeting.
- Deactivate your microphone and camera by default, as soon as you enter the meeting.
- It should not be possible to save recordings in the cloud.
- It should not be possible to save the chat history.
- It should not be possible to send files via Zoom.
- It should not be possible to send automatic feedback to Zoom.
- Using virtual backgrounds should be enabled and even recommended.
- Only the host should be able to start recording.
- Only the host should be able to make annotations.
- When entering the meeting, the participants’ microphones should be muted. The host should then decide if it is possible to unmute the microphones.
- The possibility to re-name oneself during a meeting should be enabled.
- The “datacenter regions” should be as limited as possible, at best, only data centers in the EU or the European Economic Area should be selected.
How do I manage data breaches?
If third parties obtain information from the meeting, it is called a data breach. This can happen
- if unauthorized participants join the meeting,
- if information on the meeting is published on unauthorized channels,
- if the meeting is recorded without having obtained the affected persons’ approval.
Please contact the IT Support, if you suspect a data breach.
Videotutorials
Part 1: Preparations in Portal²
How do I book a virtual room in Portal²? Where do I find the link to the room? How can I start the video conference? The first part of our video instructions provides answers to these questions.
Part 2: Handling the basic features in Zoom
We will show you the basic features you may need during a Zoom meeting.
Part 3: Technical handling of the host features in Zoom
We show you additional features which are important if you are the host of the meeting.